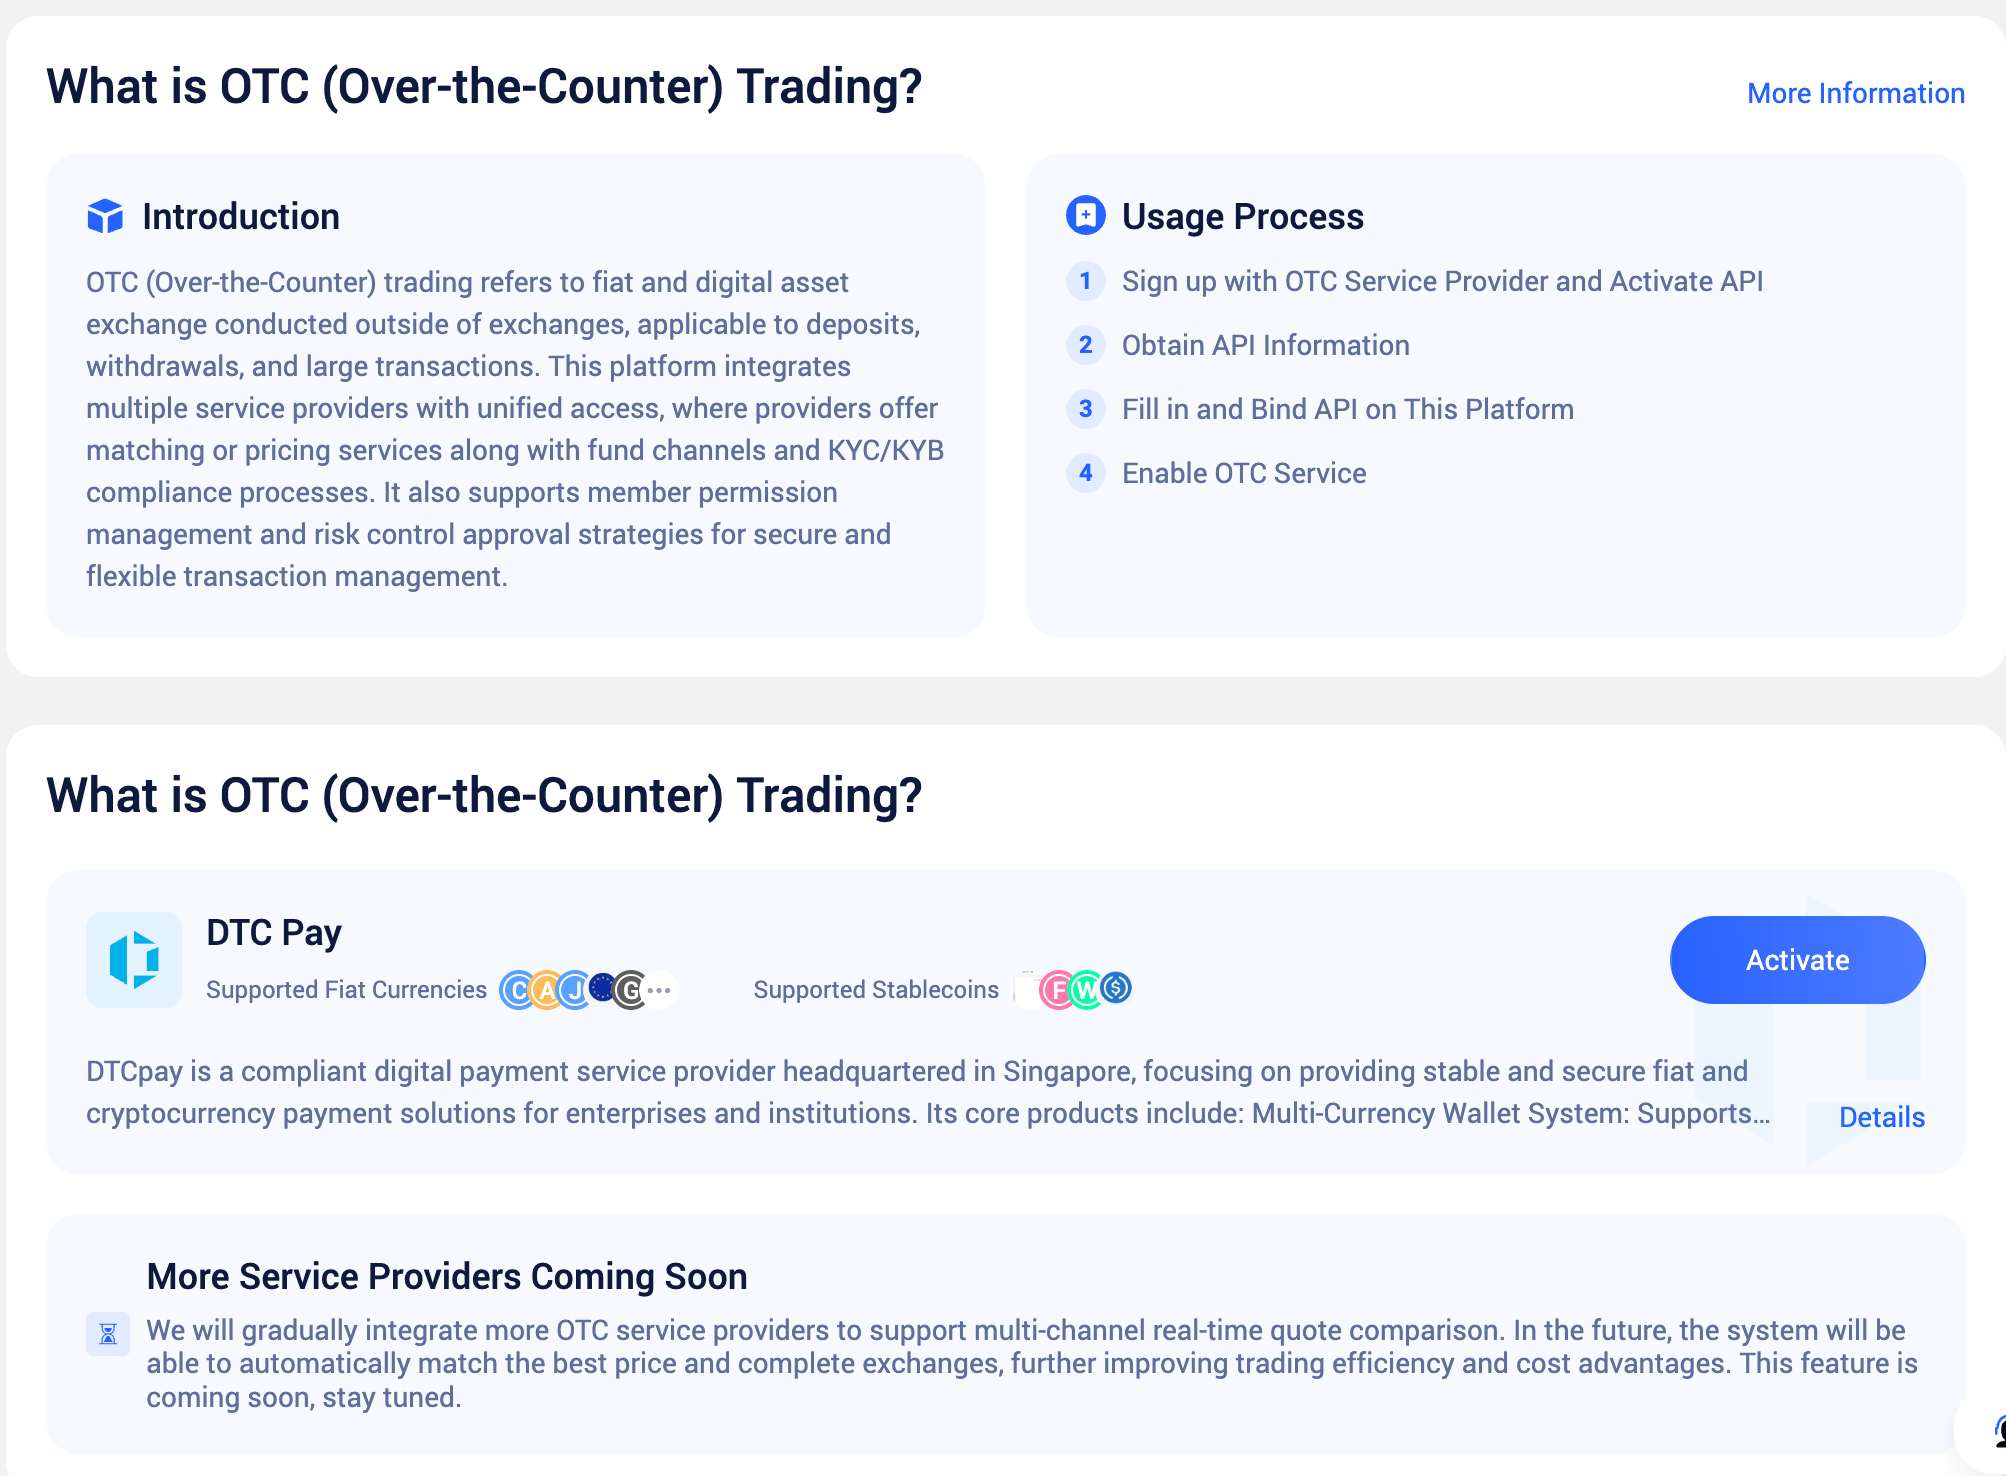
OTC Services Provided by DtcPay
We work with DtcPay through an API integration model. Once account registration and configuration are complete, you can access DtcPay’s full OTC capabilities within this system, leveraging the platform’s multi-dimensional security policies and member management mechanisms for efficient, compliant business operations.
I. Account Registration & Configuration
1. Account Registration
We work with DtcPay through an API integration model. You need to first complete merchant registration on DtcPay and obtain the corresponding API credentials. Once configured, you can access DtcPay’s full OTC capabilities within this system while utilizing our various featured functions for more efficient business operations.
Registration: If you choose DtcPay — a licensed and compliant OTC service provider — you must first create an account on the DtcPay platform. You can contact our platform’s customer service for registration guidance and assistance to simplify integration and shorten onboarding time, or you can contact DtcPay directly to complete the registration process on your own. If you already have a DtcPay account, you can proceed directly to add and configure the account within this system.
2. System Configuration
Before configuration, please ensure you have successfully registered on DtcPay and have the appropriate account permissions (please use an account with API generation privileges).
Obtain Platform Credentials
On this platform’s OTC page, click the “Activate” button. The system will automatically generate the following information (available for direct copy):
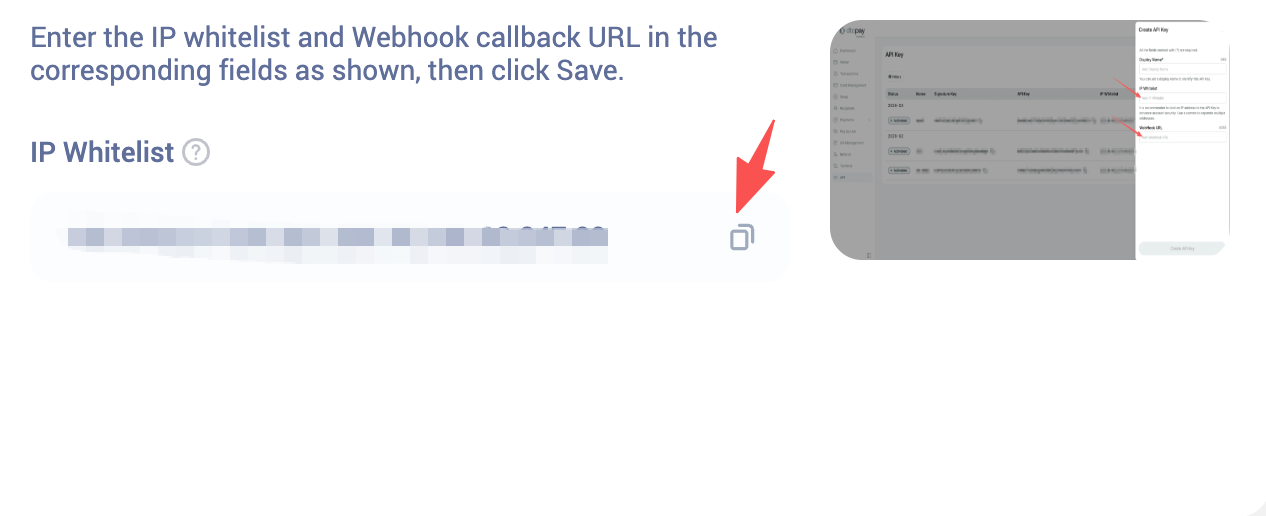
- IP Whitelist Address: Used to authorize this system’s server access in the DtcPay dashboard
Create API in DtcPay Dashboard
Log in to the DtcPay admin dashboard, navigate to the API Management page, click “Create”, and fill in the IP whitelist address obtained in the previous step to create an API.
Upon successful creation, the system will generate three key parameters:
| Parameter | Description |
|---|---|
API Key | Unique client identifier |
API Secret | API request secret key |
Signature key | Signature verification key |
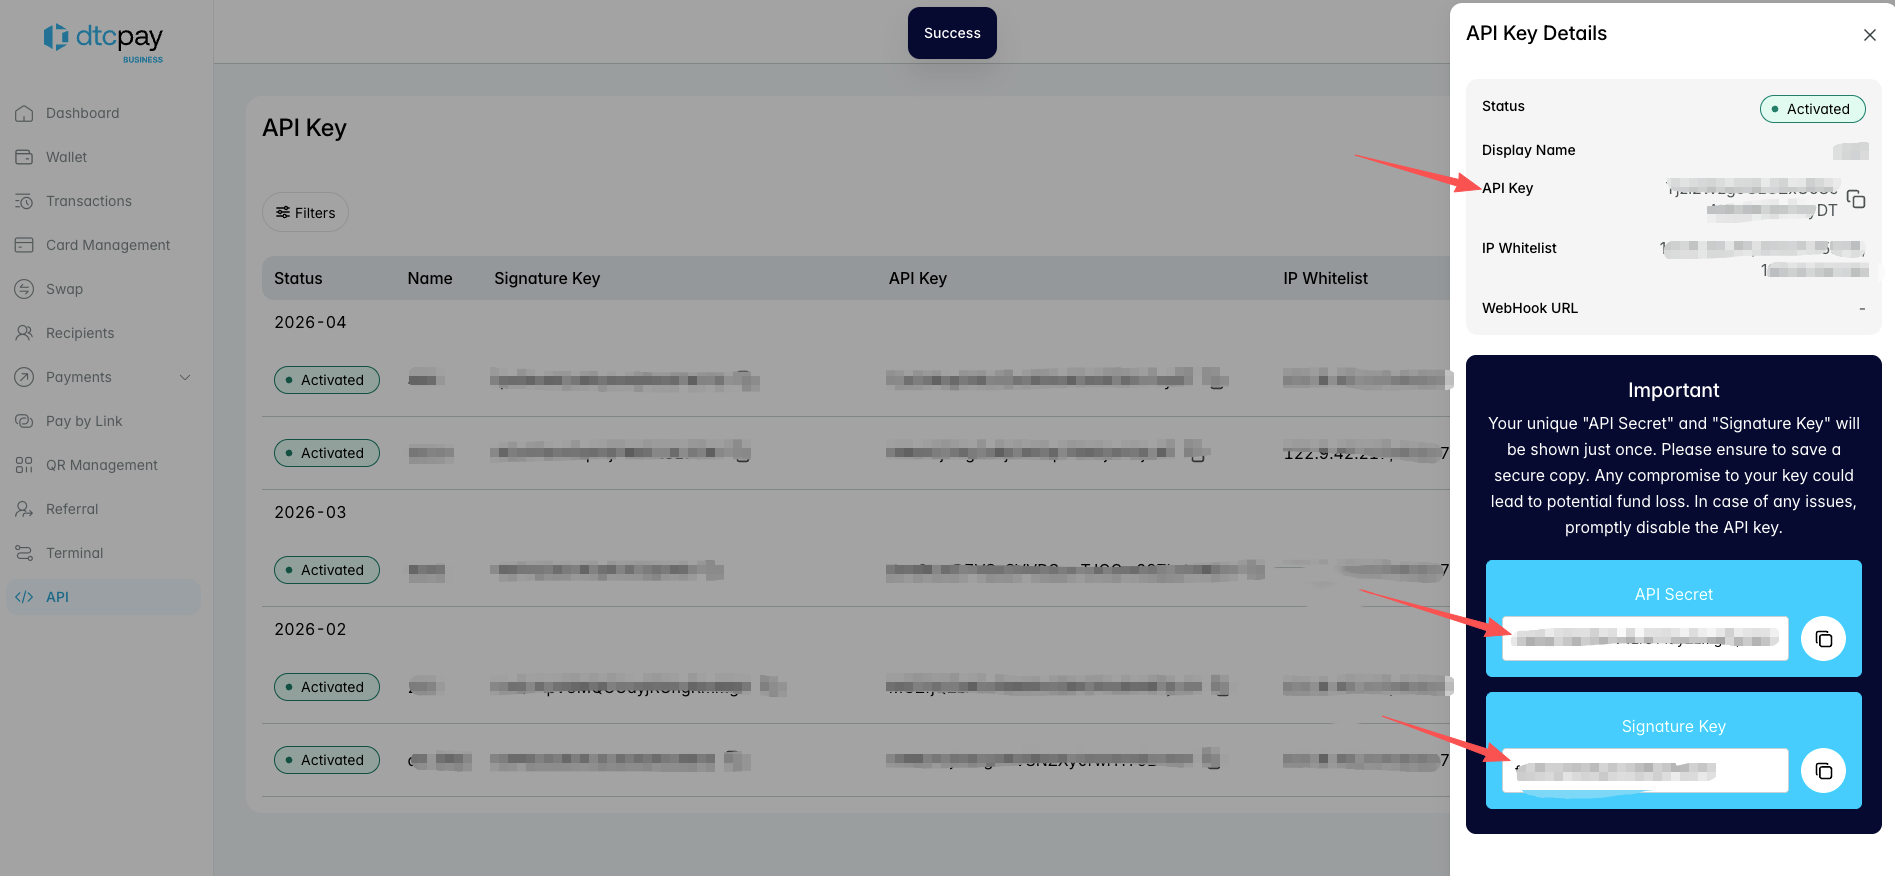
Please keep these parameters safe and never disclose them in any form.
Complete System Configuration
Return to this system and enter the generated ClientId, SecretKey, and Sign Key into the corresponding fields, then click “Create” to complete the configuration.
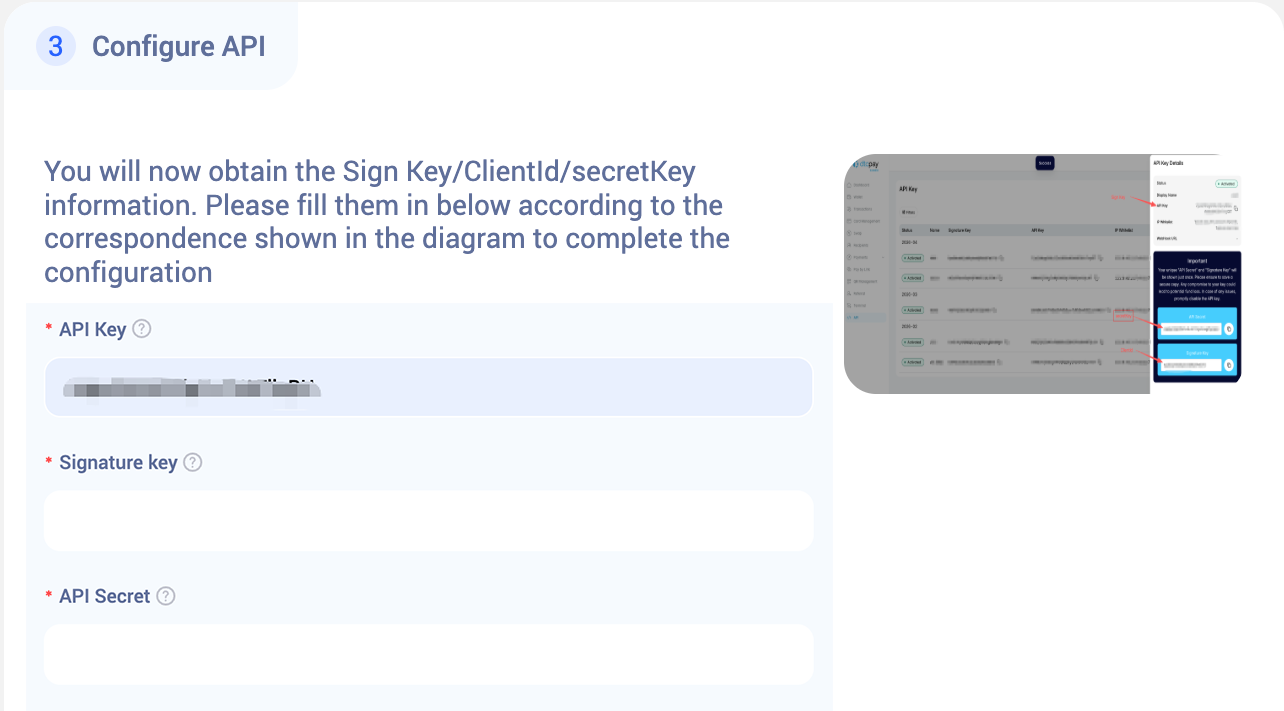
Once configured, you can start using the full OTC trading features provided by DtcPay.
II. Invite Co-Management Members
To improve team collaboration efficiency, you can add workspace members to the OTC member list for collaborative management.
View Member List
Click the “Members” button in the upper right corner of the page to expand the current member list.
Assign Members
Select the workspace members you want to participate in OTC management from the list.
Save Settings
After making adjustments, click the “Confirm” button at the bottom to apply the configuration.

Permissions & Notes:
| Item | Details |
|---|---|
| Default Permissions | Workspace creators and admins have management permissions by default and cannot be removed or disabled |
| Flexible Adjustment | Members can be removed from the list at any time based on business needs |
| Approval Flow Restriction | If the target member is the sole/final approver of an approval flow, please remove or replace them in the approval flow before proceeding |
III. Configure OTC Security Policies
The OTC policy engine is used to build a rigorous and customizable risk control framework, supporting both basic policies and advanced policies.
Once approval policies are configured, all business scenarios that trigger approvals will strictly enforce the preset rules. The system ensures policy execution integrity at the foundational level, preventing any bypass or malicious tampering.
Basic Policies
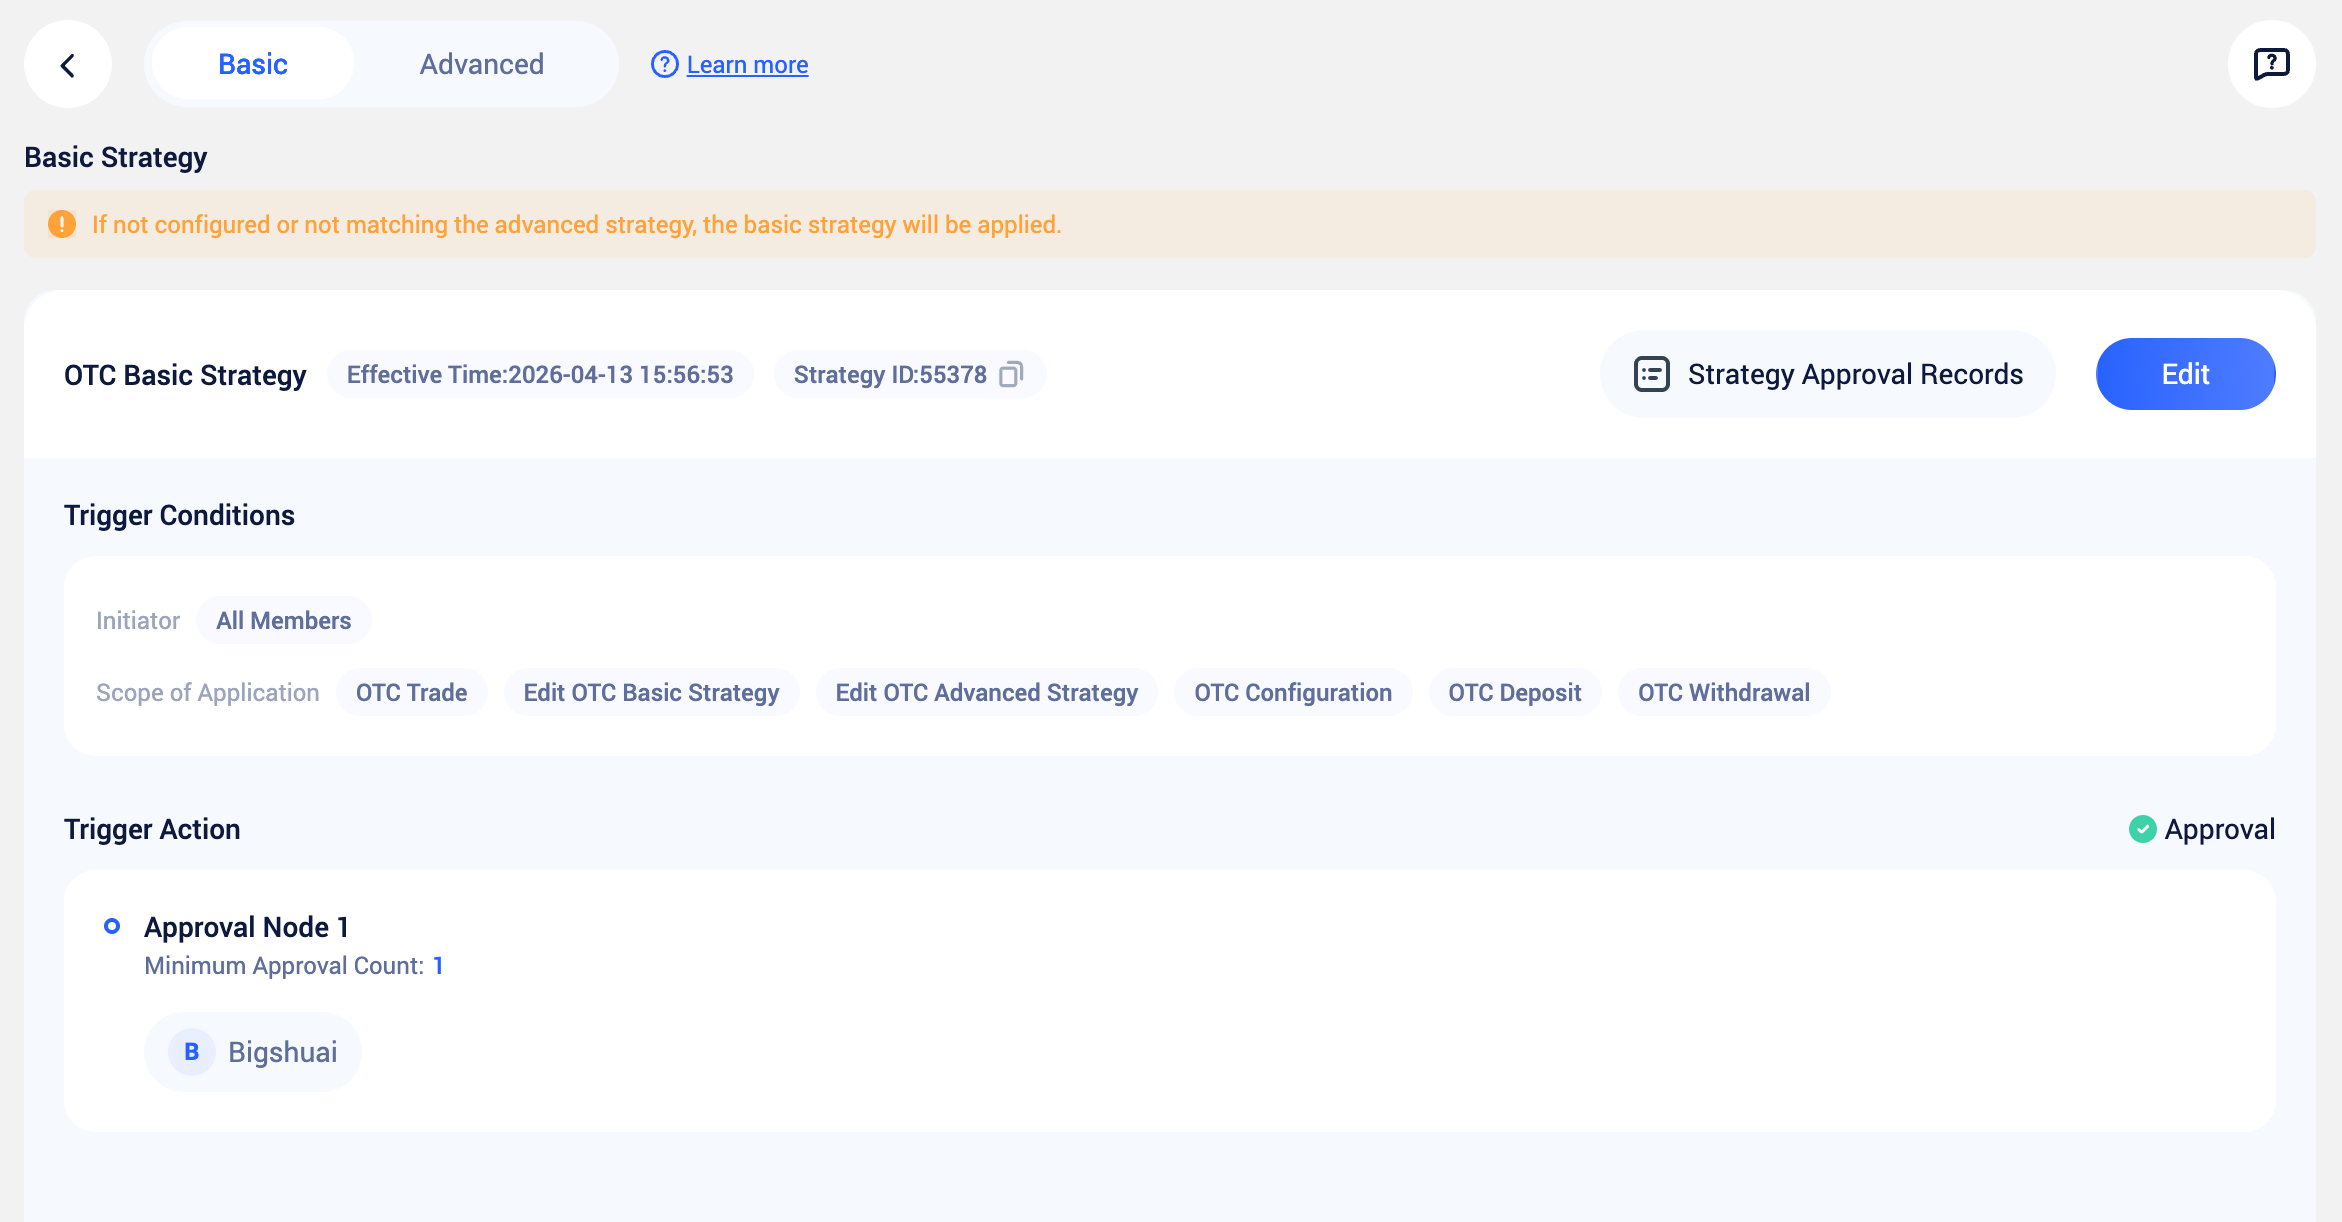
Basic policies are system-level risk control schemes automatically generated when the OTC feature is enabled, covering all core high-sensitivity operations to ensure critical changes remain under controlled oversight.
Controlled scenarios include:
| Category | Specific Scenarios |
|---|---|
| Fund Changes | OTC deposits, withdrawals, and trading operations |
| Rule Modifications | Editing basic policies, advanced policies, or API configurations |
| Permissions & Accounts | Account management (fiat account information), whitelist management (stablecoin addresses) |
Approval mechanism details:
- Default Configuration: The creator is the approver
- Flexible Adjustment: The final approver can be changed to any OTC member
- Node Management: Supports adding or removing approval nodes — click “Edit” to customize approval paths
- Audit Trail: View all policy changes and approval execution details via “Approval Policy Records”
Advanced Policies
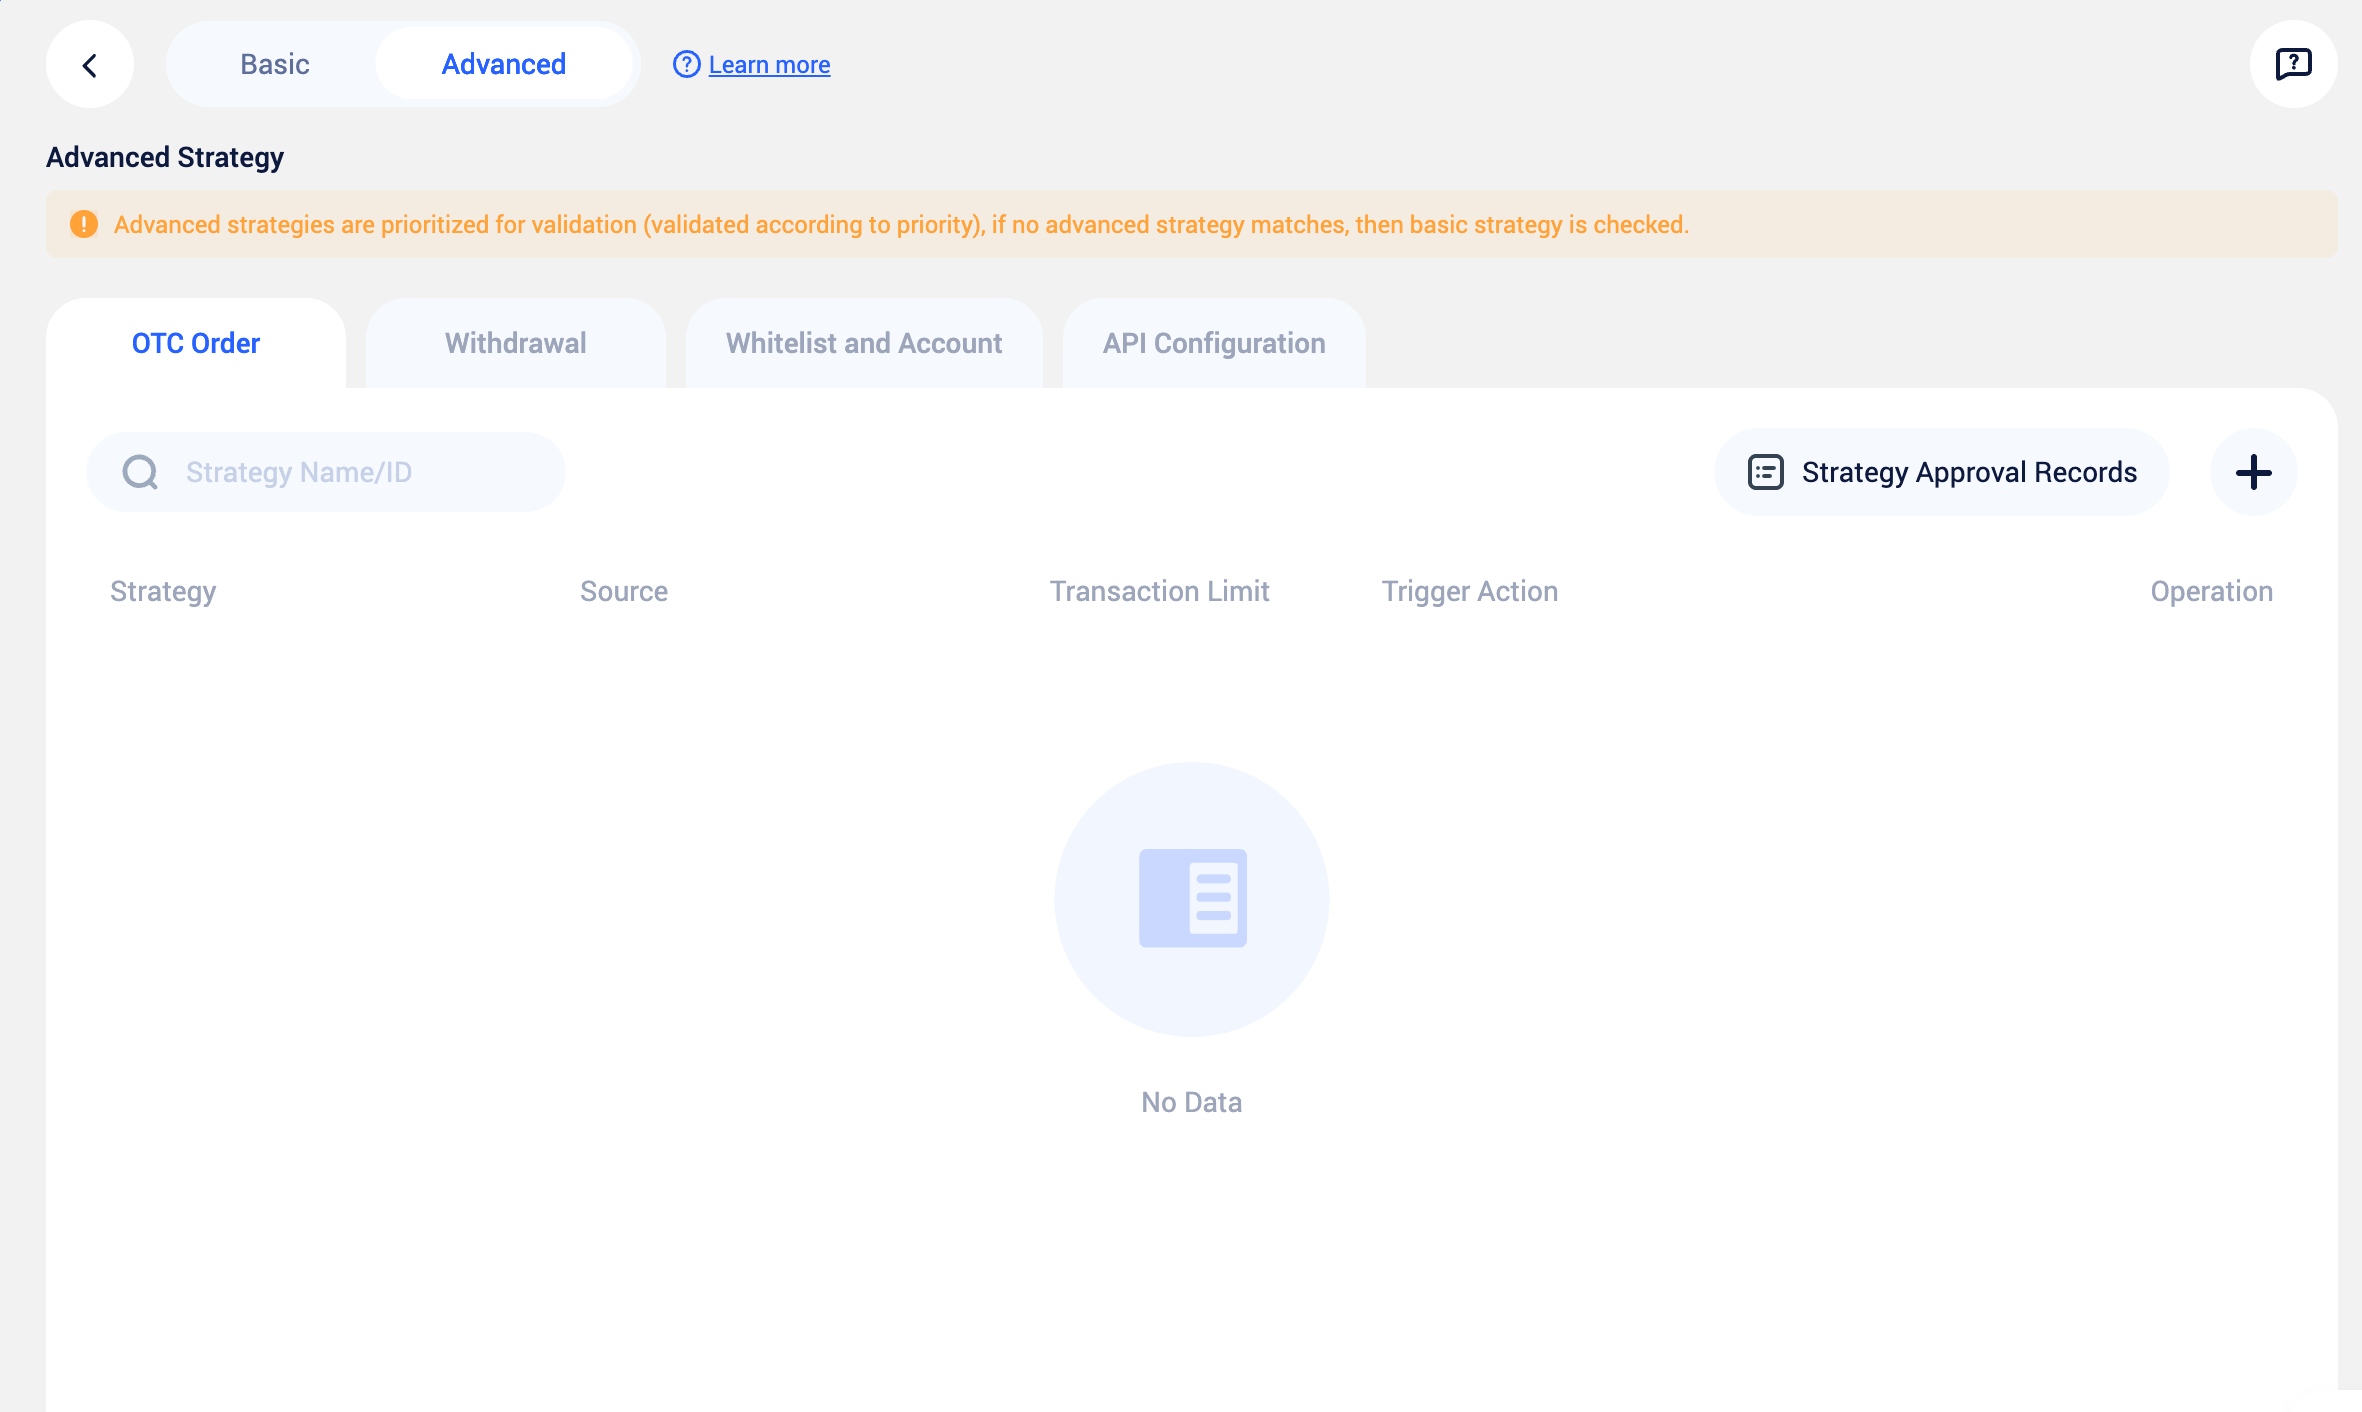
Advanced policies are designed for more granular and complex business scenarios, with execution priority higher than basic policies:
- Priority Matching: The system first checks whether an advanced policy is triggered
- Fallback Mechanism: If no advanced policy is matched, the system automatically falls back to the basic policy
Trigger scenarios & condition configuration:
| Scenario Type | Configurable Conditions |
|---|---|
| Trading & Fund Withdrawal | For OTC trades, fiat/stablecoin withdrawals — trigger approval flows based on member, currency, single transaction limit, etc. |
| Sensitive Configuration Management | In whitelist, account management, and API configuration scenarios — specify particular operators to trigger higher-level approval |
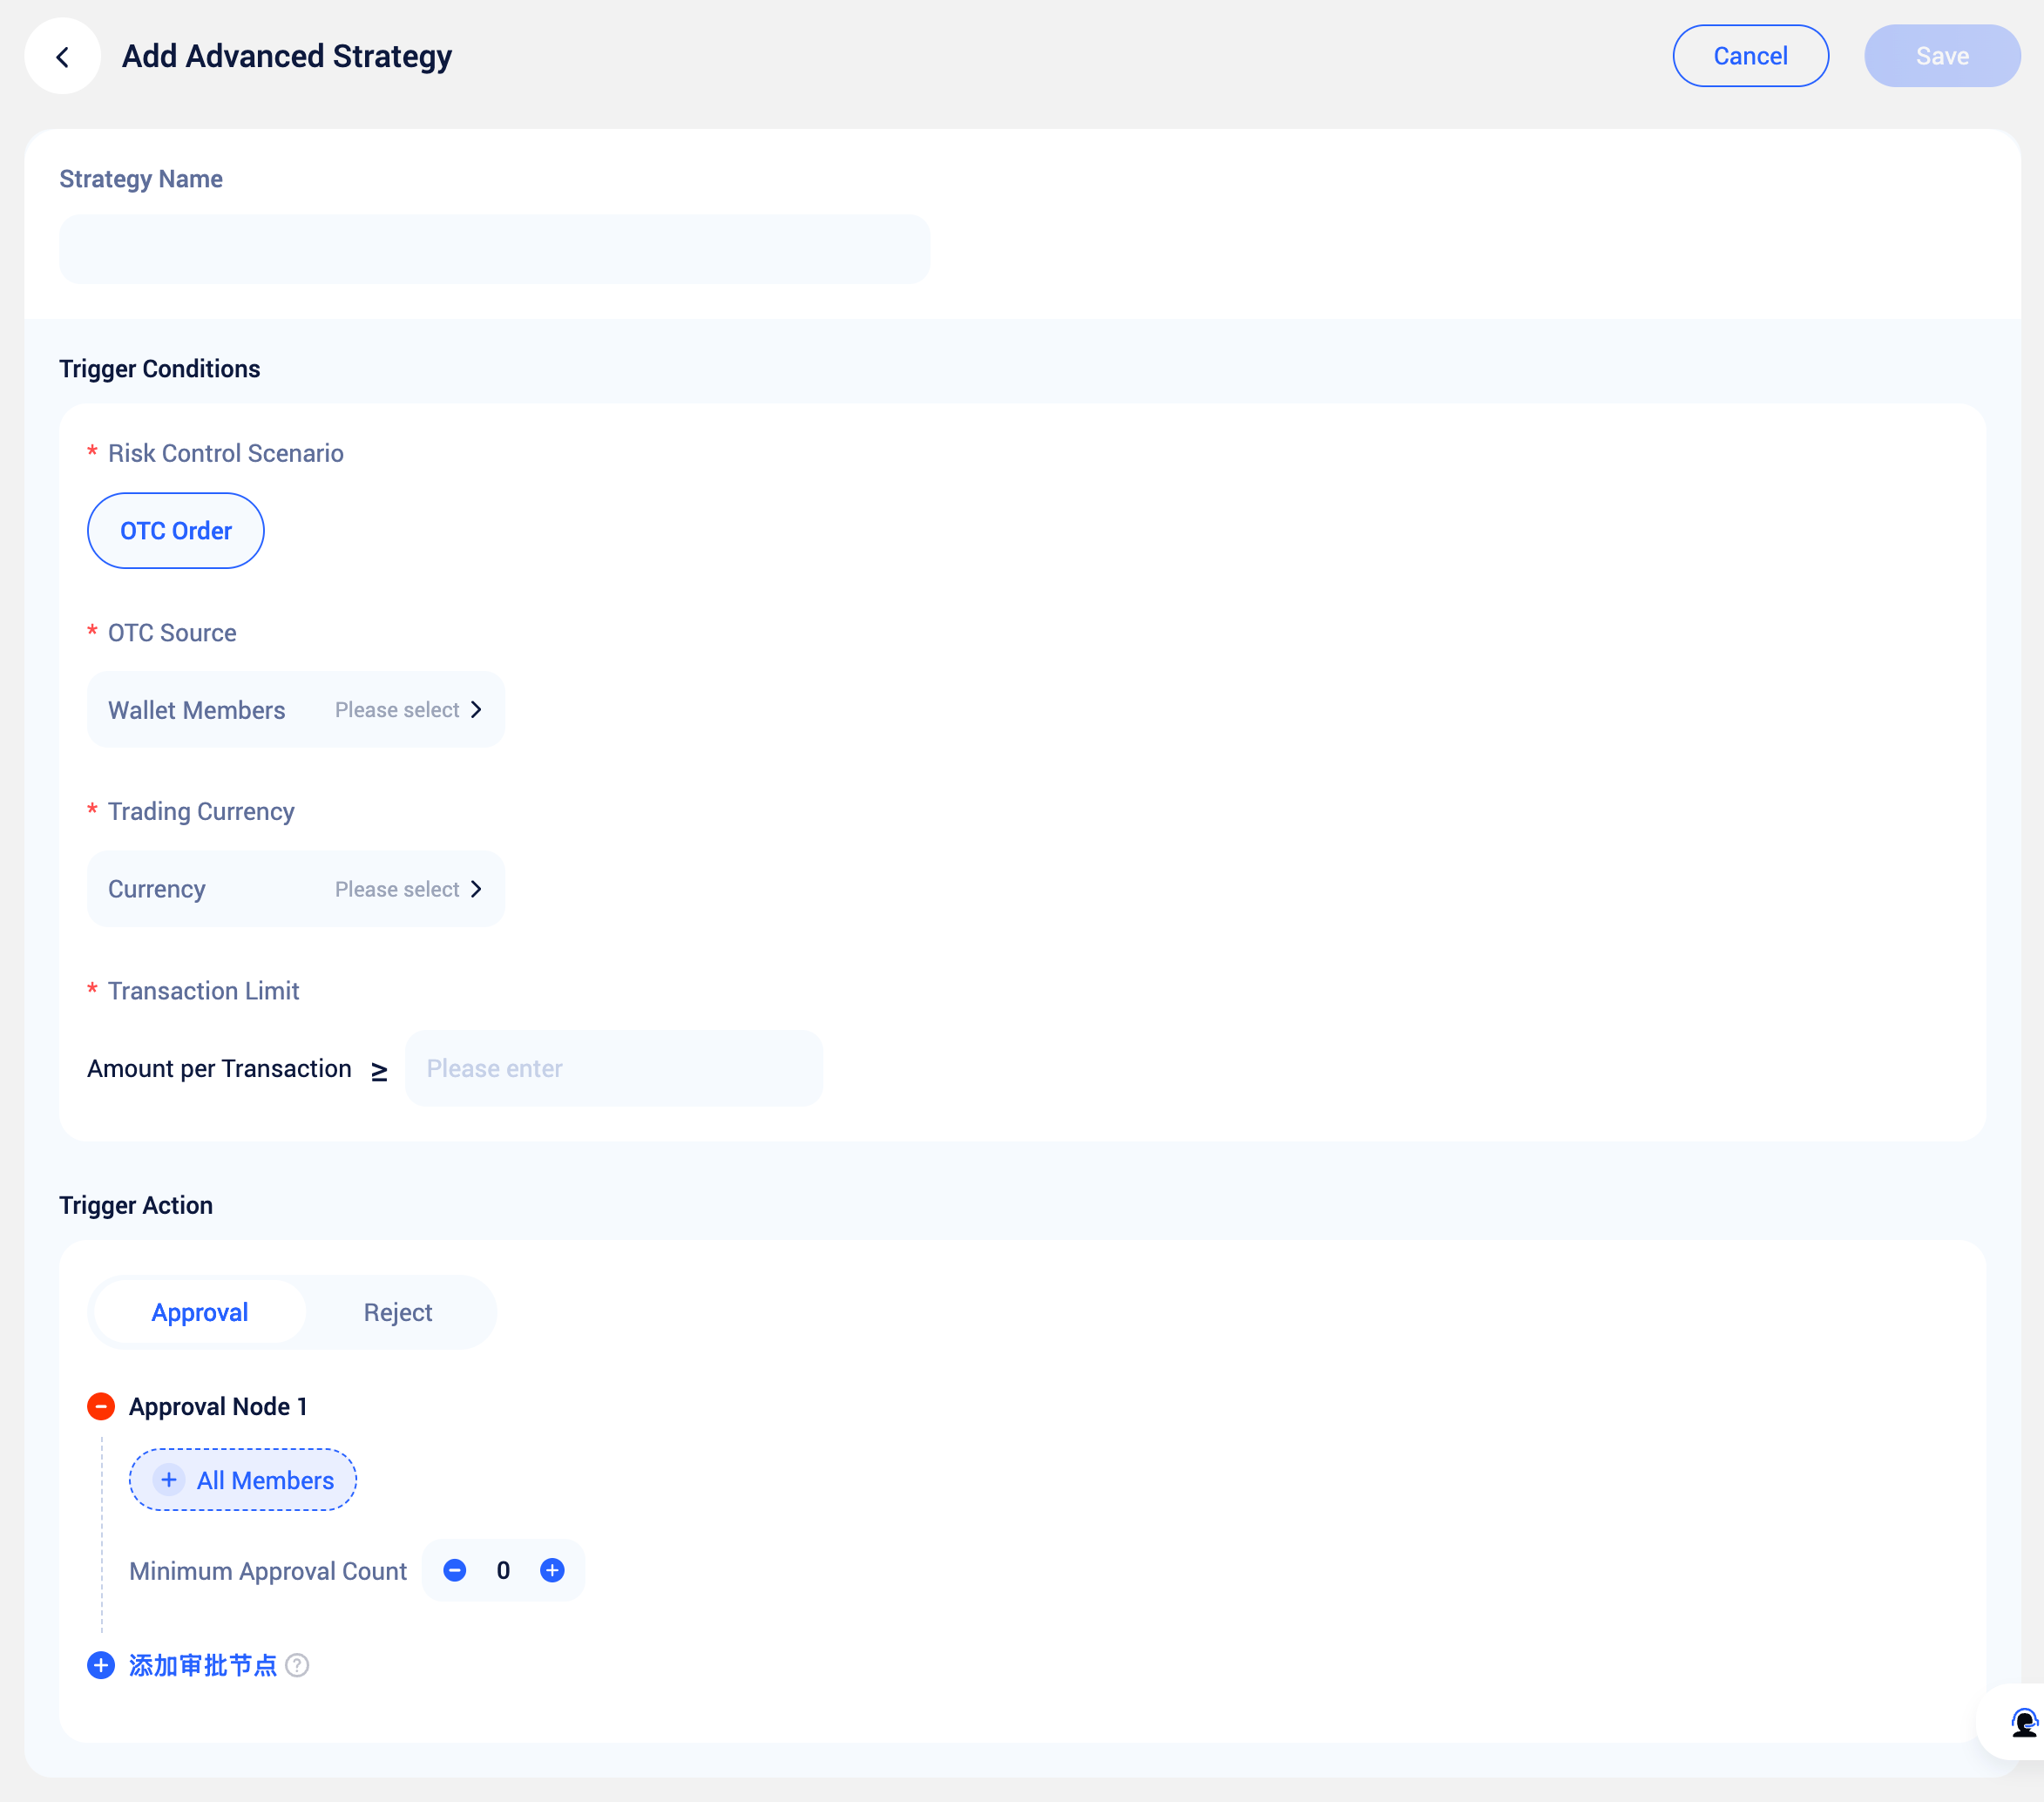
Each advanced policy supports configuring independent approval paths and nodes for differentiated risk control management.
IV. Stablecoin Whitelist & Fiat Account Management
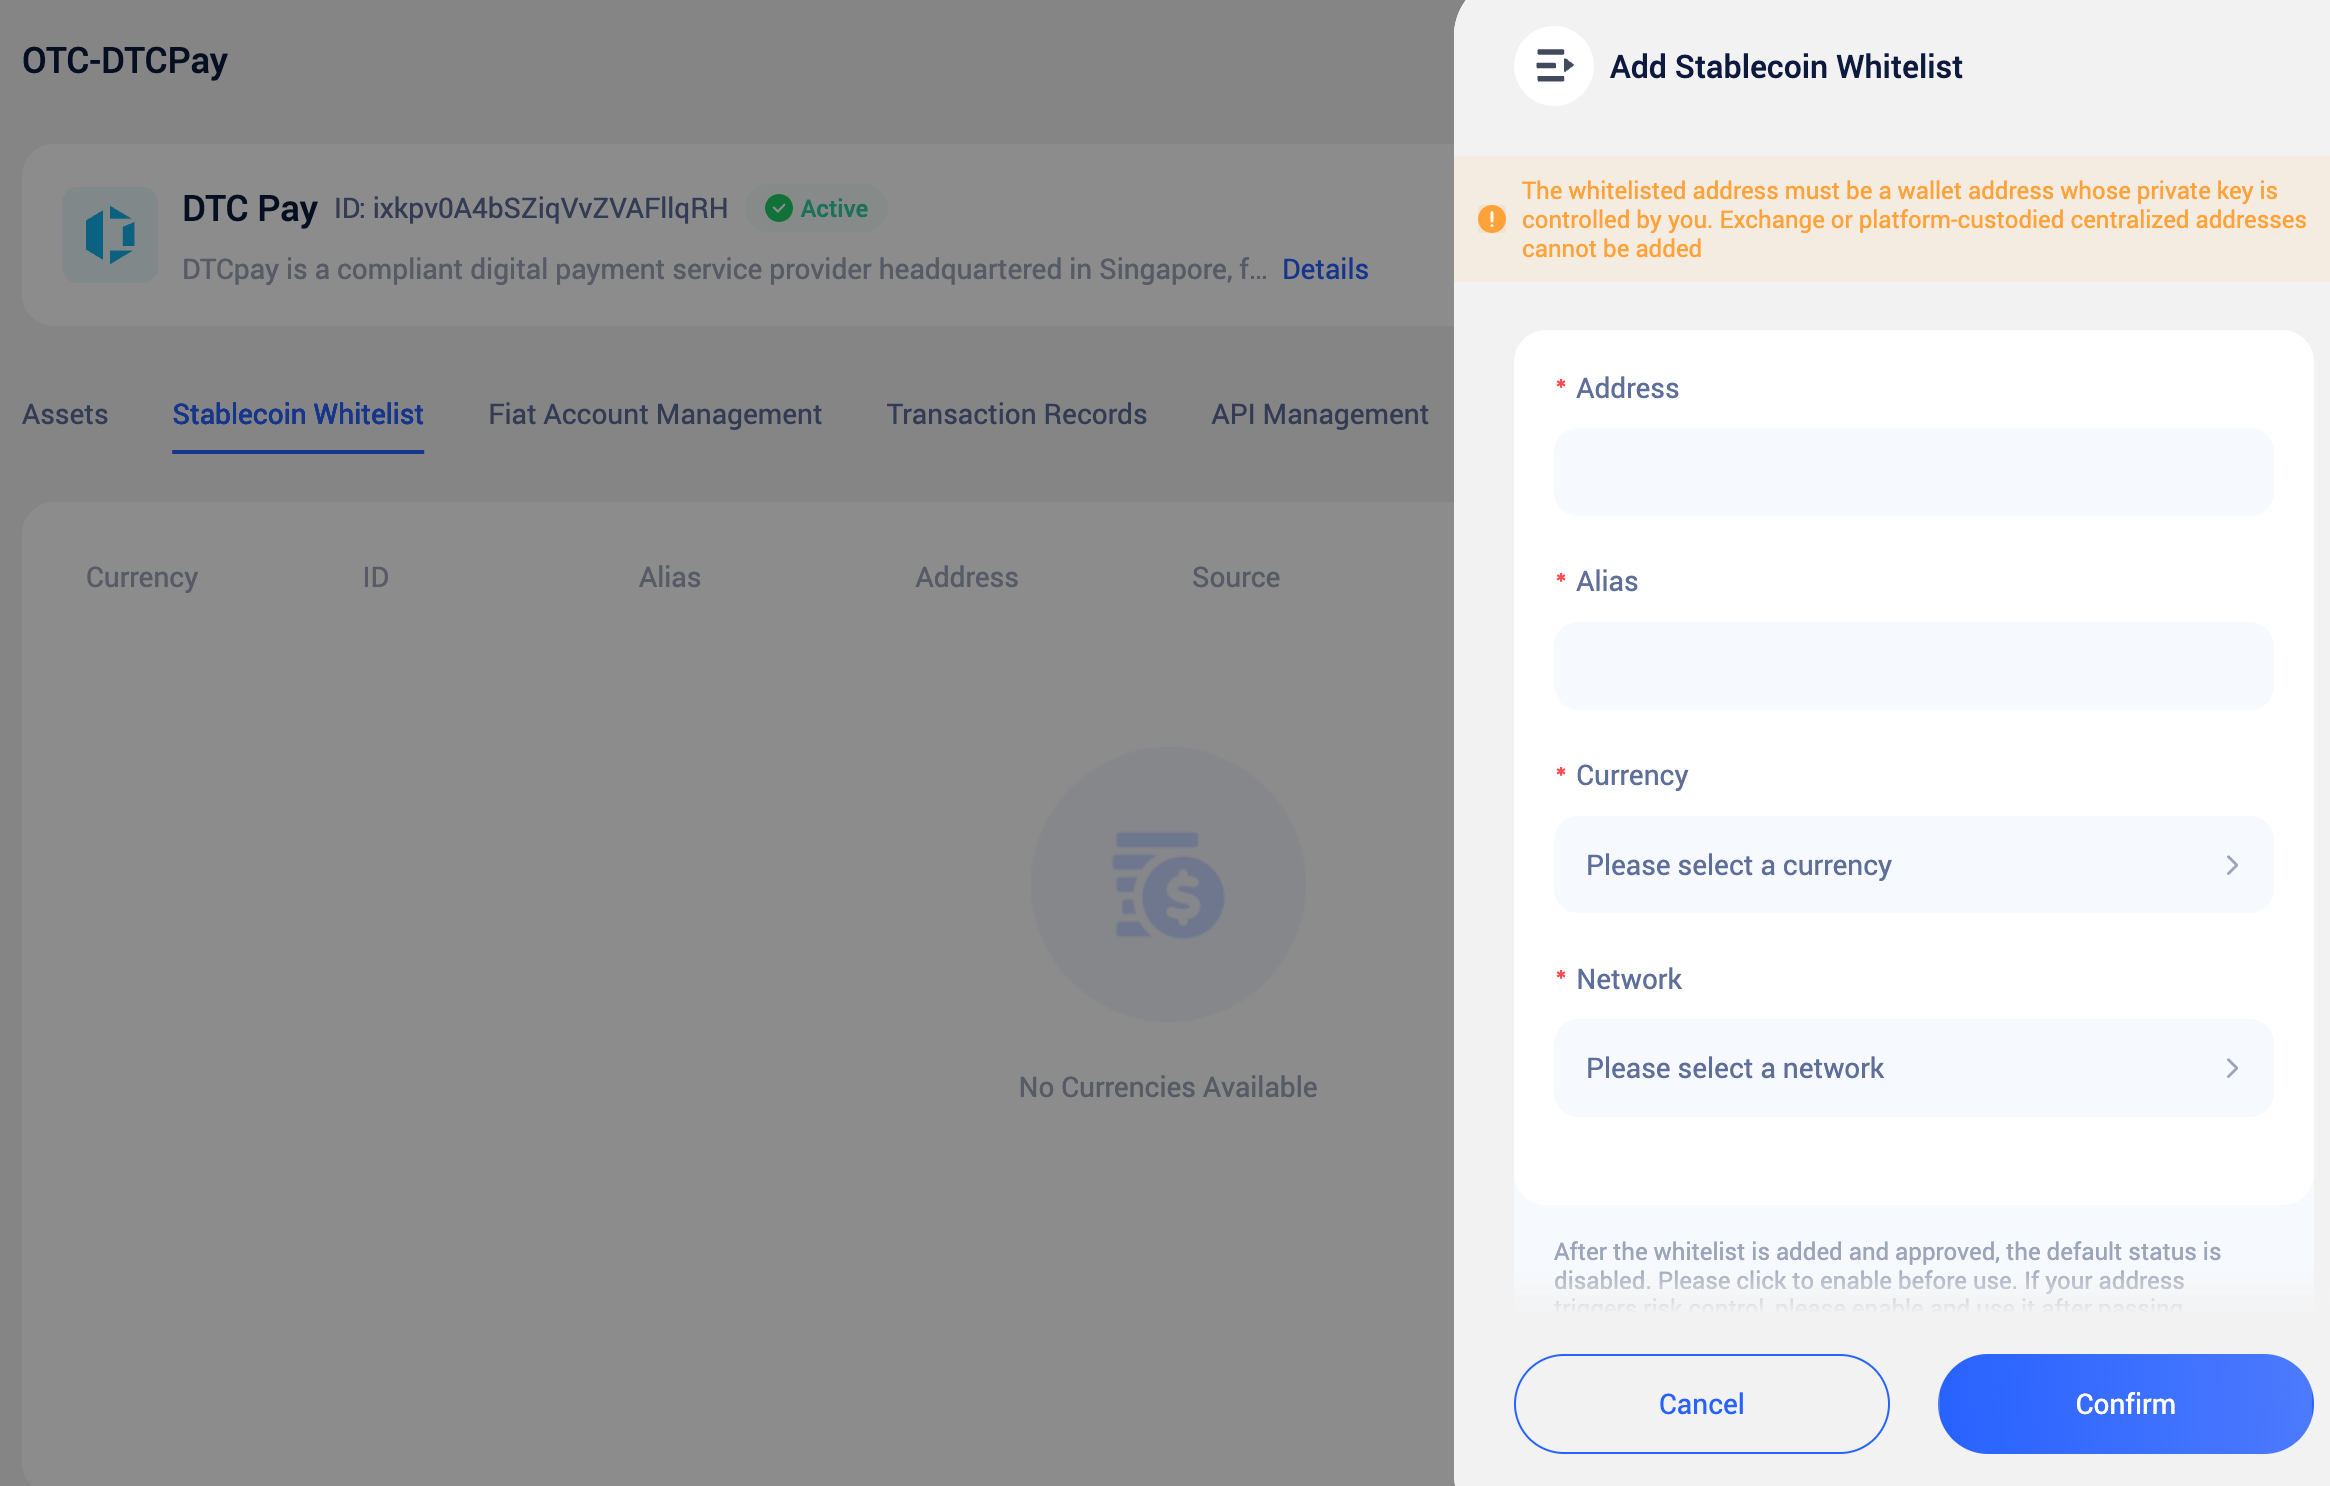
Stablecoin Address Whitelist
The stablecoin address whitelist is used to manage and restrict withdrawal addresses, ensuring funds only flow to wallet addresses you control.
Whitelisted addresses must be wallet addresses for which you hold the private keys — exchange or platform-custodied addresses are not permitted. Additionally, when depositing stablecoins to DtcPay, transfers must originate from a whitelisted address; otherwise, the funds may not be credited.
Configuration steps:
Add Address
On the stablecoin whitelist page, click “Add”, enter the wallet address, and fill in an address alias (avoid similar names to prevent confusion).
Select Network & Currency
Choose the corresponding blockchain network and currency, then click “Confirm” to save.
Await Approval & Enable
The addition will trigger a security policy approval. After approval, the address is disabled by default and must be manually enabled before use.
Risk Control Verification (When Enabling an Address): When you enable this address, the system may trigger a risk control verification. If required, please follow the prompts to complete the process below:
- Small Transfer: Complete a small transfer of the specified amount as prompted
- Verify Address: The transfer must be made from the address that triggered the risk control
- Await Activation: Wait for system verification after the transfer is complete
Verification funds will be fully credited to your DtcPay wallet balance. After verification is passed, the funds can be used normally — no funds will be lost.
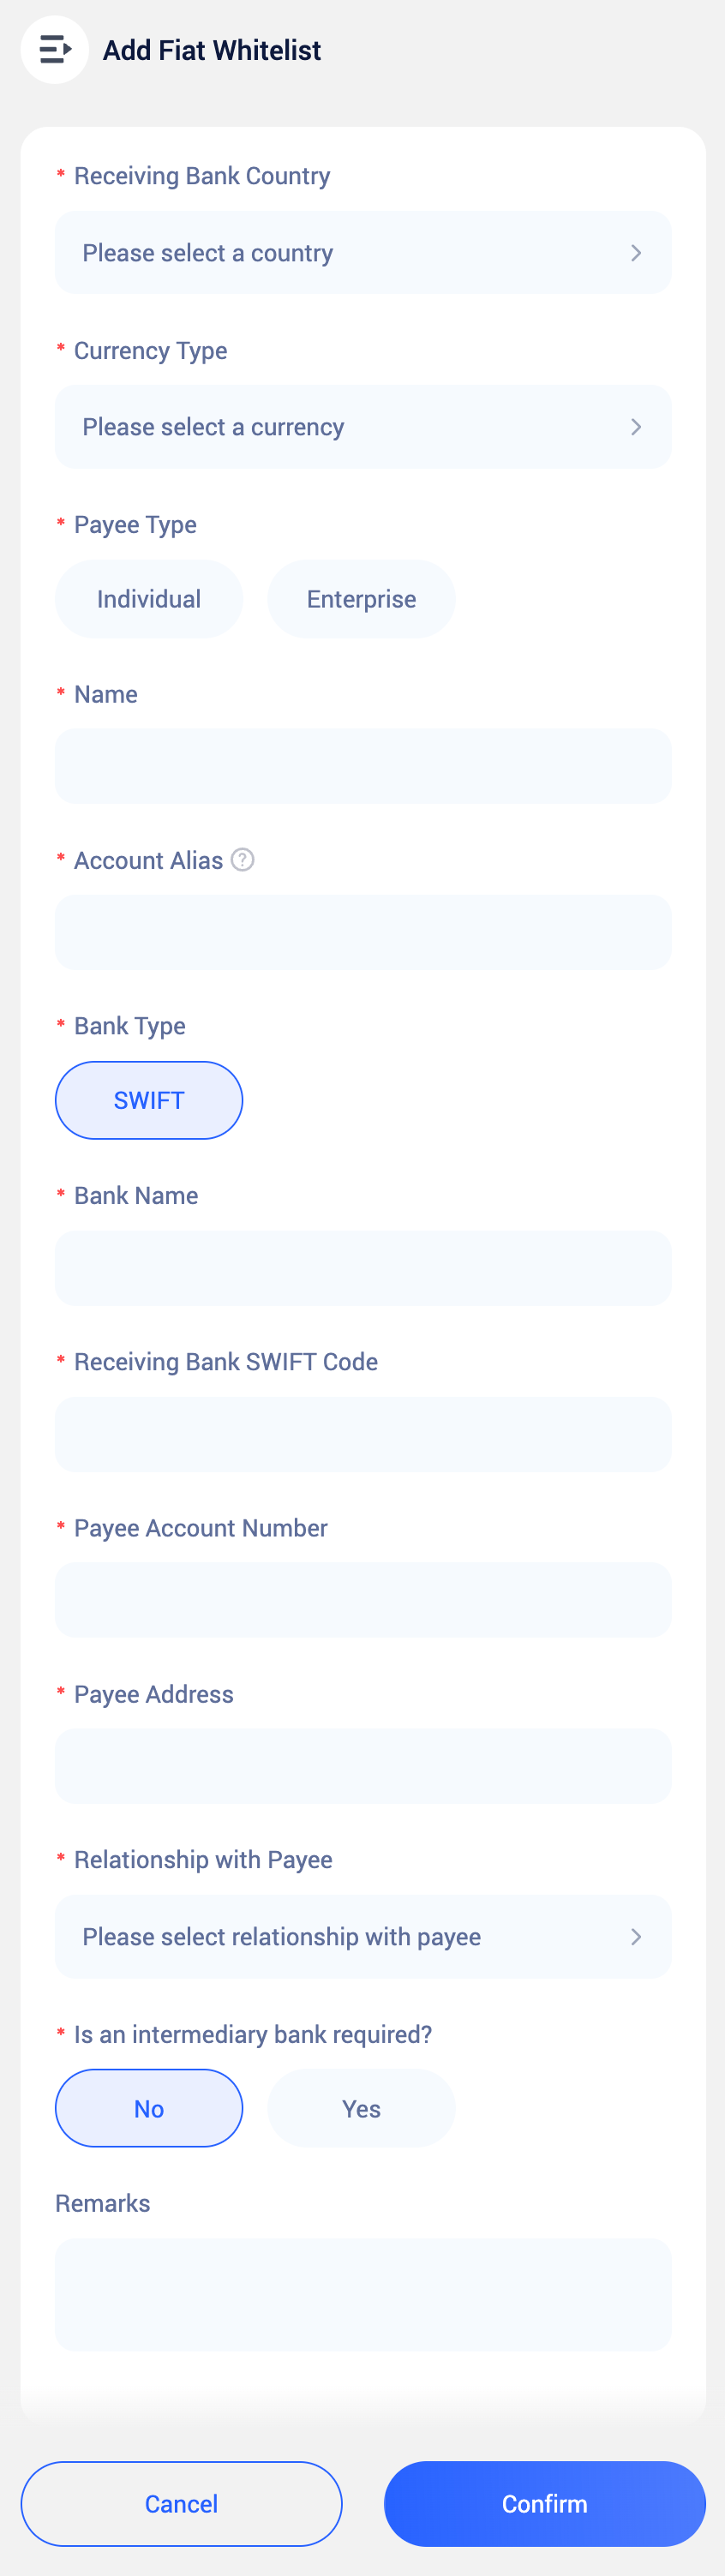
Fiat Account Configuration
Fiat accounts are receiving accounts used for fiat withdrawals. You can choose your own account or a third-party account for withdrawal operations. Adding complete account information in advance helps improve efficiency and reduce errors.
Please ensure that the bank account information you provide is accurate. For specialized fields such as SWIFT Code, we recommend contacting your bank to verify before submitting, to avoid withdrawal failures.
| Account Type | Description |
|---|---|
| Personal Account | Automatically linked to registration information (name/company name, etc.); key information cannot be modified |
| Third-Party Account | Can be filled in freely, but requires withdrawal proof and fund purpose documentation (AML compliance requirement) |
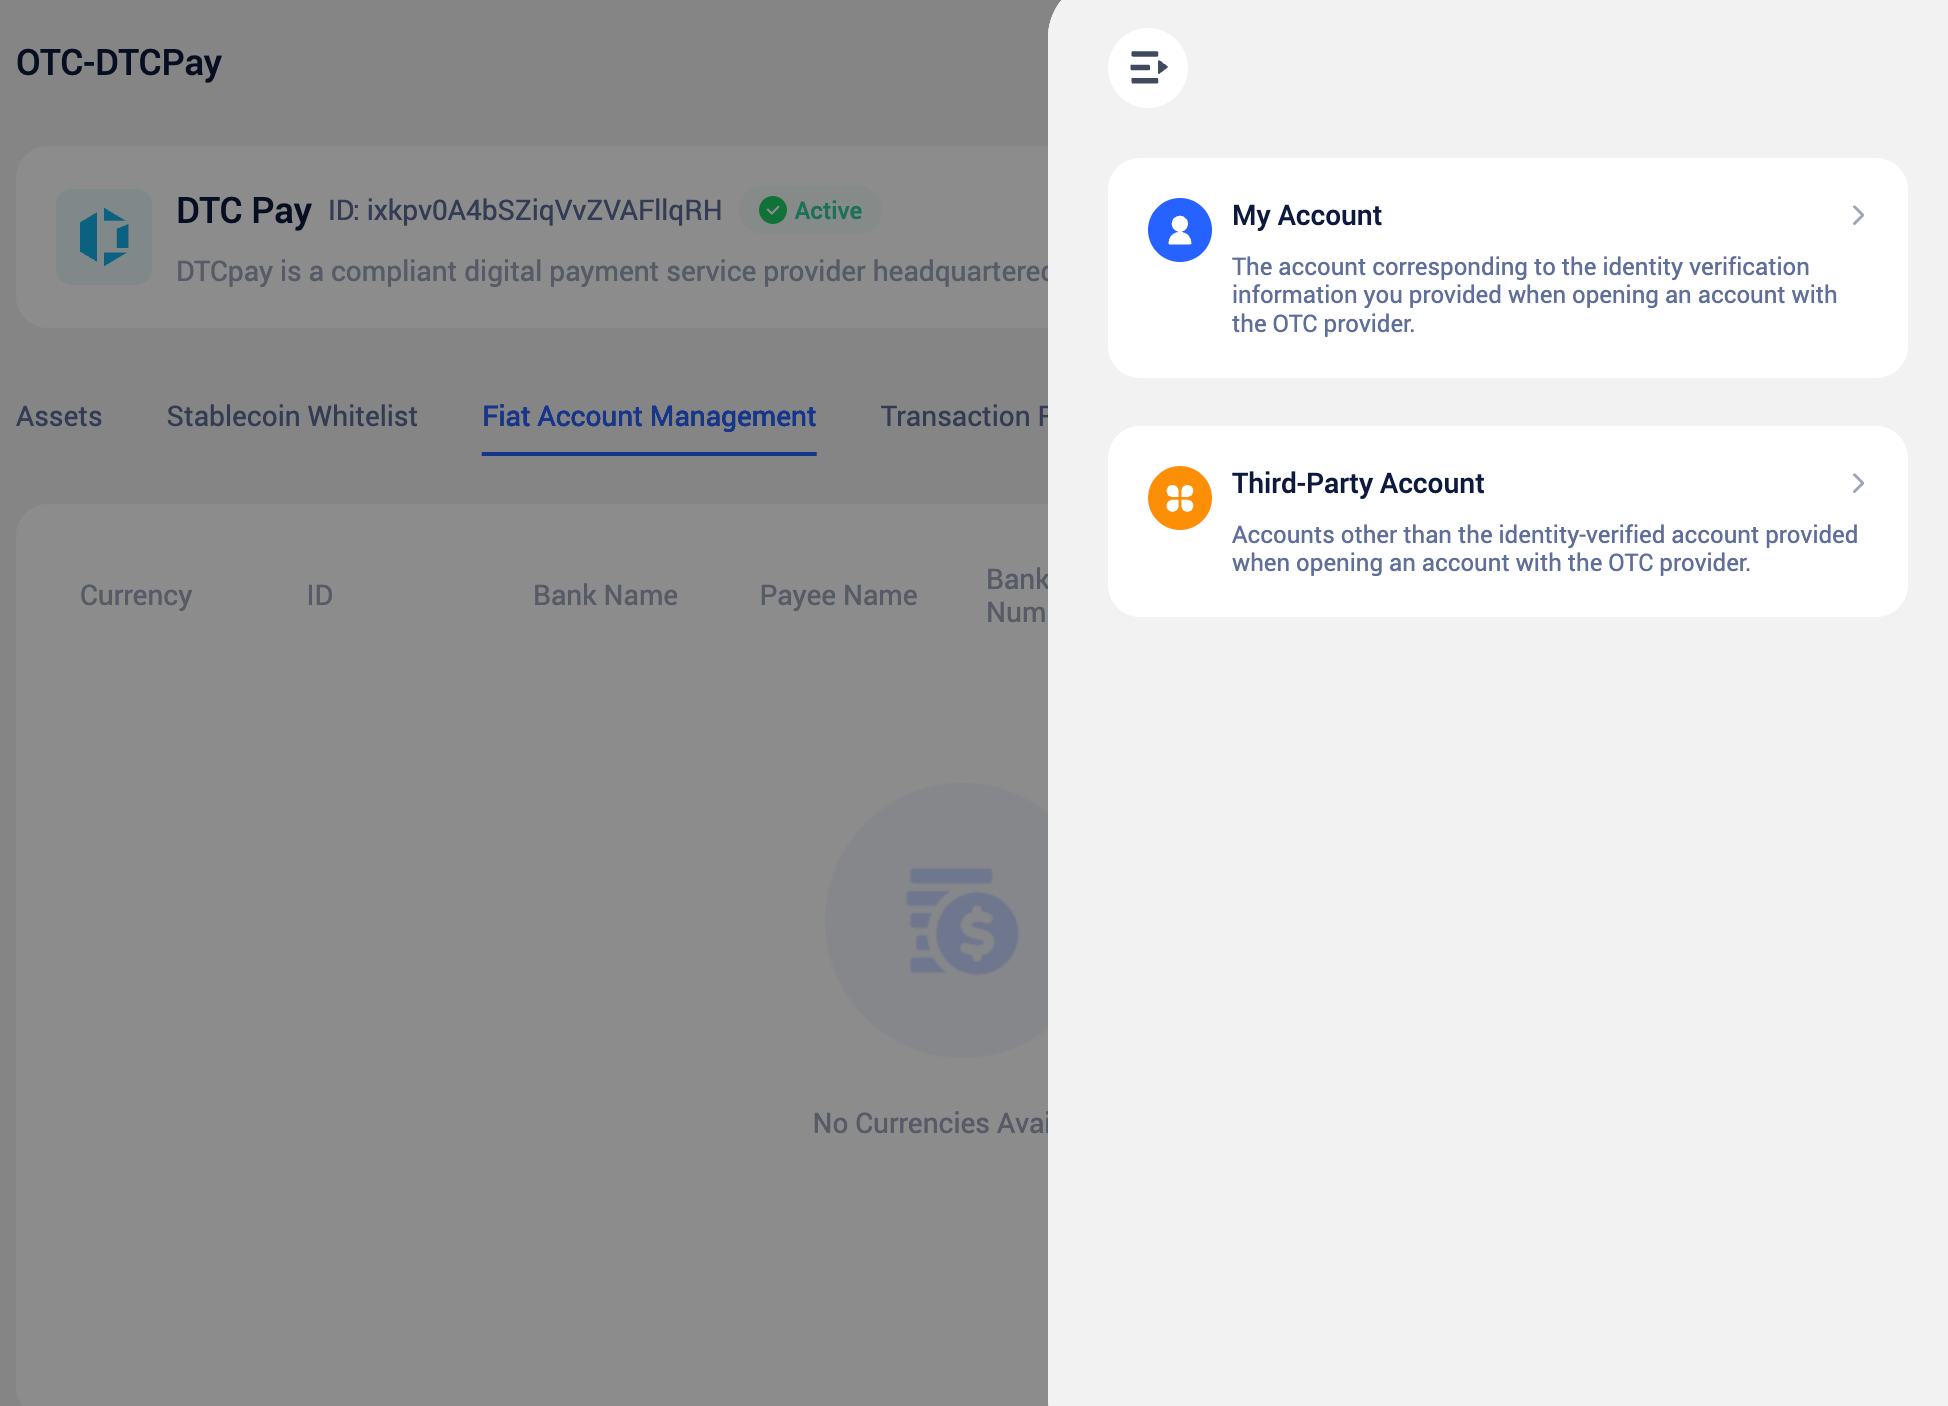
After selecting the account type, fill in the information based on your actual account details.
V. Deposits
DtcPay operates on a pre-deposit model. Before conducting OTC trades, you must first deposit fiat or stablecoins into the DtcPay designated account for subsequent trade settlement and fund flow.
Account balances can be flexibly used based on business needs and can be withdrawn at any time to your bank account or blockchain address for efficient fund scheduling and management.
Stablecoin Deposits
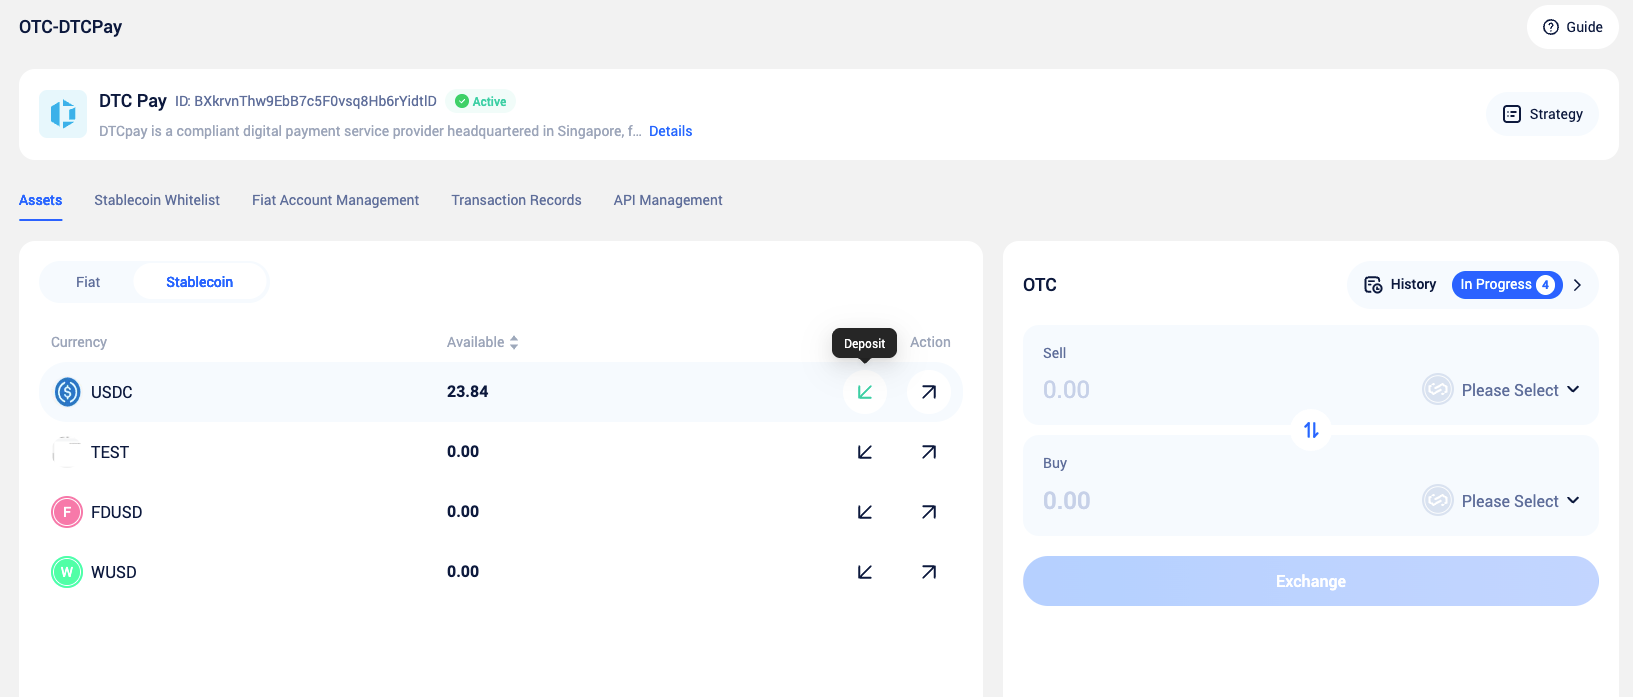
Steps: Select target currency → Click “Deposit” → Select the corresponding blockchain network → Select the deposit whitelist address
Risk Warning: Please verify the deposit network information (e.g., ERC20, TRC20, etc.). Any asset loss caused by selecting the wrong network is at your own risk.
Credit Notice: After confirming the information is correct, transfer funds to the system-provided address. Funds will be automatically credited after on-chain confirmation and can then be used for OTC trading.
Please verify the blockchain network (e.g., ERC20, TRC20). Losses caused by selecting the wrong network are at your own risk.
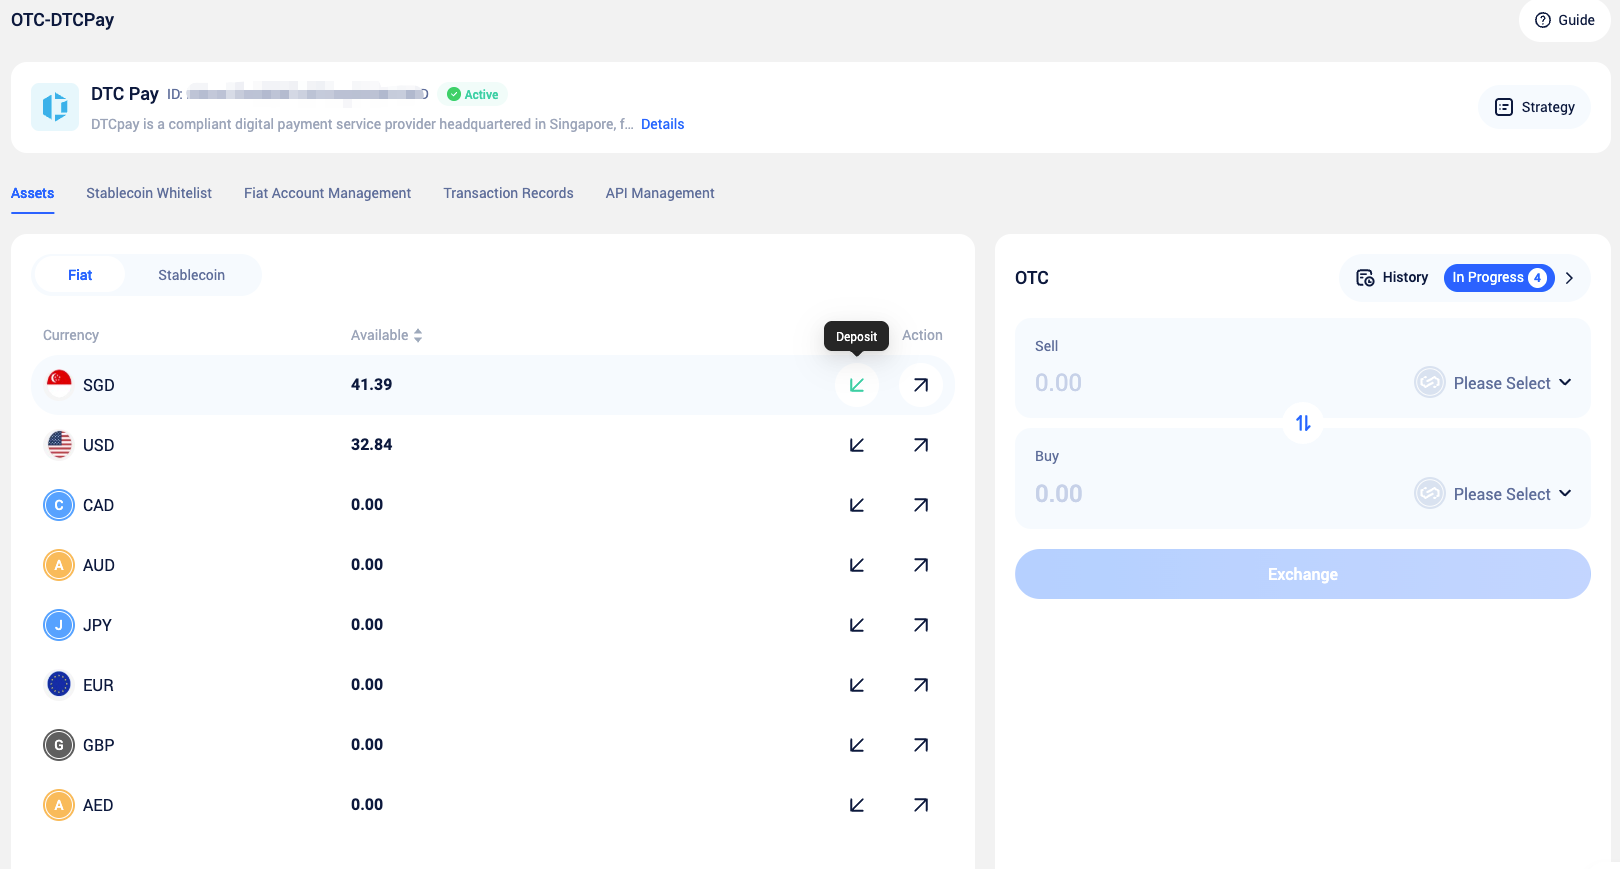
Fiat Deposits
Create Order
Select the target fiat currency, click “Deposit” and confirm the order. The system will display the receiving account information.
Bank Transfer
Complete the bank transfer according to the on-page instructions.

The Reference No. must be included in the transfer remarks; otherwise, the funds may not be credited or may be lost.
Upload Proof
Upload the transfer receipt and enter the actual amount, then submit for review.
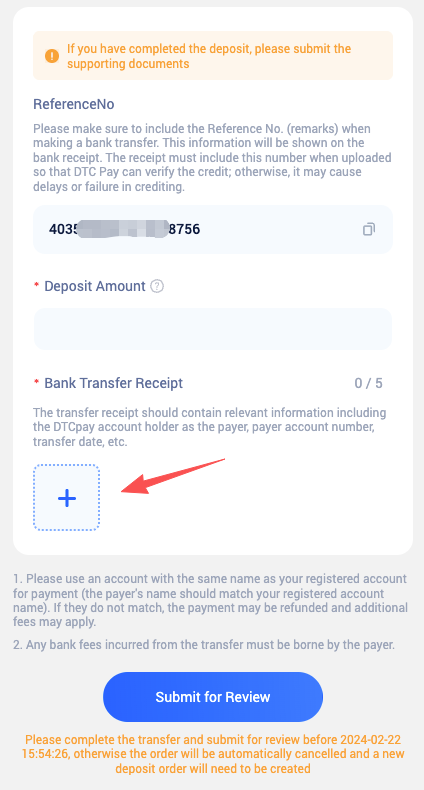
The order must be submitted within 24 hours of creation; otherwise, it will be automatically canceled.
Await Credit
After review approval, the funds will be credited to your balance. If funds are not credited for an extended period, please contact DtcPay customer support.
VI. Withdrawals
Stablecoin Withdrawal
The withdrawal address must be an address that has been added to the whitelist.
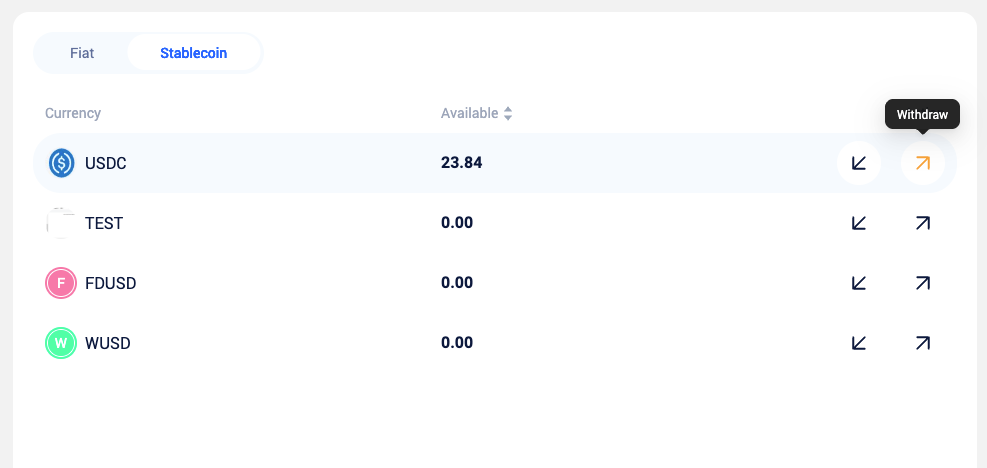
Initiate Withdrawal
Click “Withdraw” in the currency list.
Fill in Details
Select the network and enter the address and amount.
Submit for Approval
Submit the request; it will be executed after approval.
Fiat Withdrawal
Supports withdrawal to your registered entity account or a third-party account.
Withdrawals to third-party accounts require proof of fund purpose (e.g., invoices, contracts, etc.).
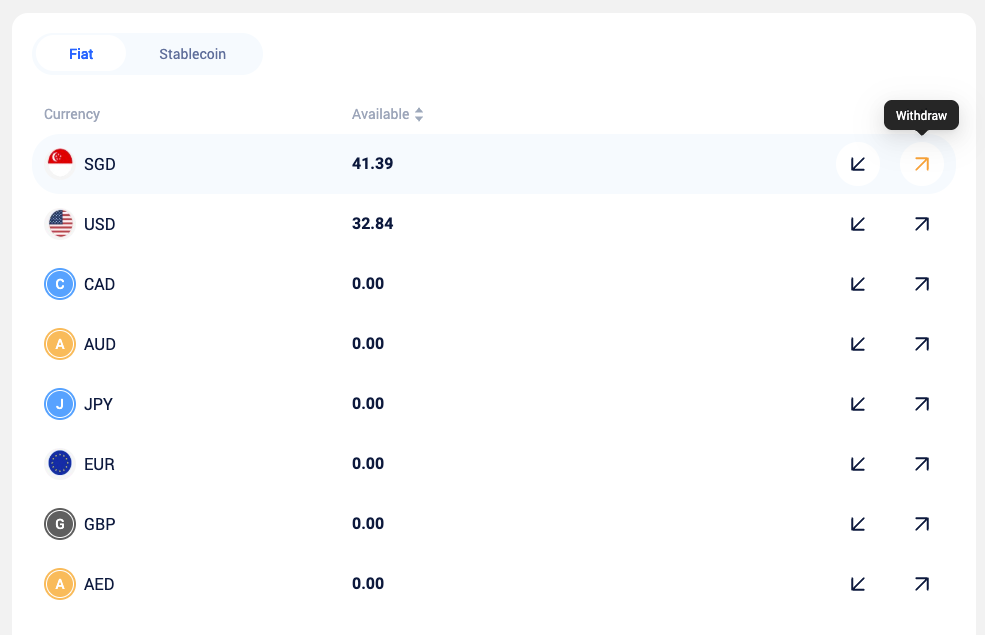
Initiate Withdrawal
Click the “Withdraw” button.
Fill in Details
Enter account and amount information.
Approval & Credit
After approval, DtcPay will process the request. The credit time depends on the bank.
VII. OTC Trading
1. What is OTC Trading
OTC (Over-The-Counter) trading refers to the direct exchange between fiat currencies and digital assets at real-time quotes on the platform.
Trades are settled by the OTC service provider (DTC Pay) through unified matching, rather than through open market order books.
In DTC’s OTC trading, the primary use case is exchanging between fiat currencies and stablecoins or other digital assets. In some scenarios, the following are also supported:
- Fiat-to-fiat exchange
- Stablecoin-to-stablecoin exchange
The specific supported trading pairs are subject to what is displayed in the system.
Common trading examples:
- Purchase USDT using fiat currencies such as USD / SGD
- Exchange stablecoins such as USDT / USDC for fiat currencies
How to Conduct OTC Trading
Before initiating an OTC trade, please ensure the account used for payment has sufficient balance.
If the balance is insufficient, please complete a deposit first (refer to the “Fiat Deposit” or “Stablecoin Deposit” guide).
Once prepared, follow the steps below:
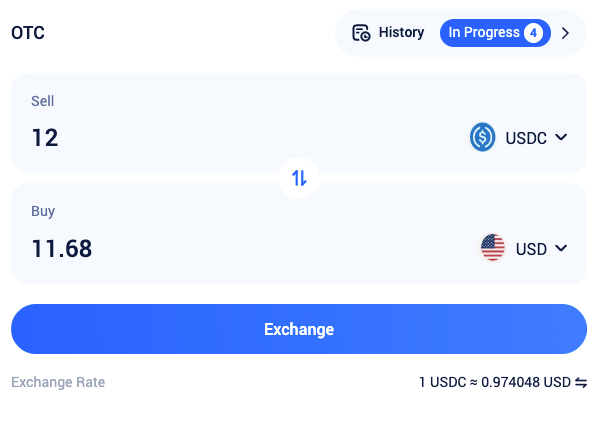
1. Select Exchange Currencies
Choose the currency you wish to sell (payment currency) and the currency you wish to receive (target currency).
2. Enter Transaction Amount
Enter the amount you wish to exchange. The system will display the corresponding conversion result in real time based on the current quote.
3. Confirm Transaction
After verifying that the transaction information is correct, submit the request.
Some transactions may require an approval process and will only be executed after approval.
4. Exchange Rate Notice
Due to quote validity limitations, if the original quote has expired by the time approval is completed, the system will execute the exchange at the latest valid rate.
The final exchange rate is based on the rate at the time of actual trade execution.
After the trade is completed, the system will finalize the fund exchange based on the confirmed rate and automatically update your account balance.
VIII. View Records
The records page displays all fund-change-related data, including:
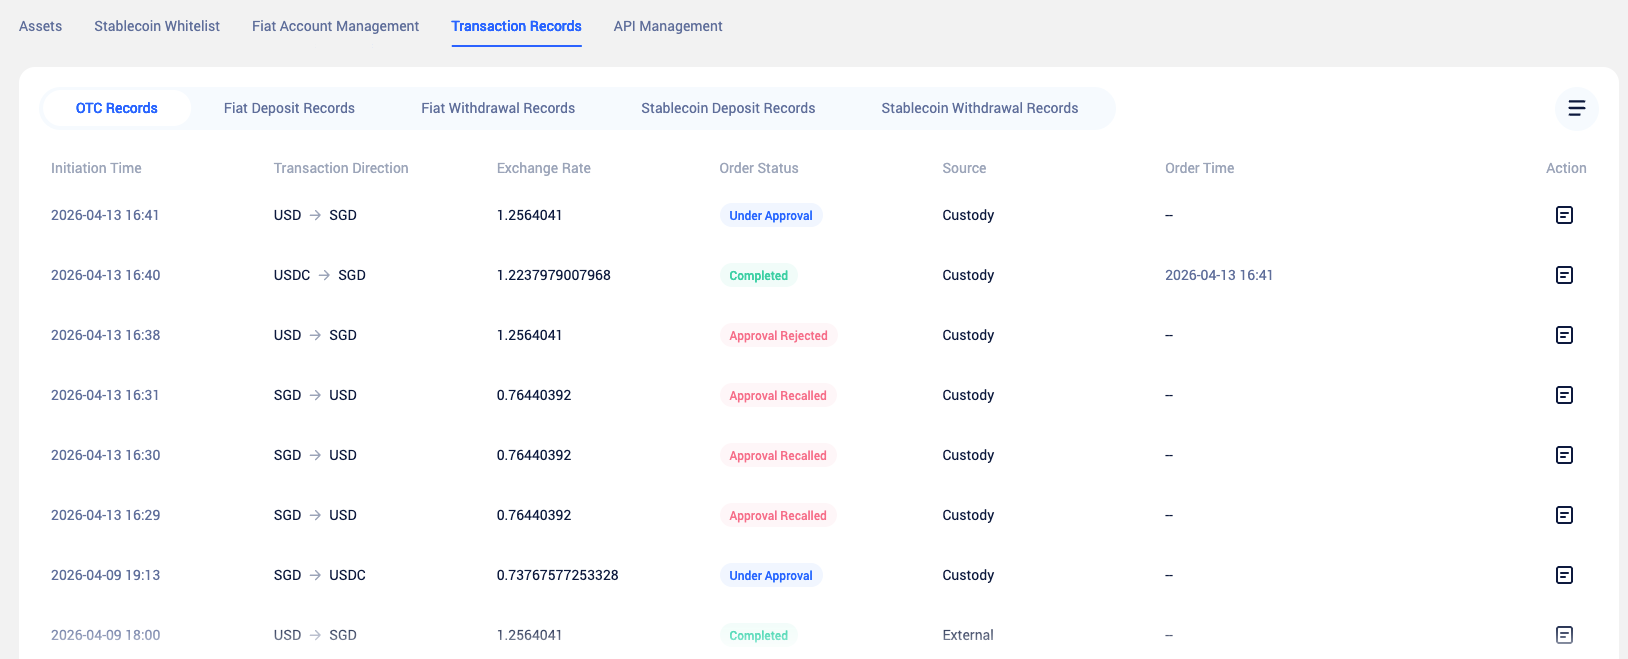
- Deposit records
- Withdrawal records
- OTC trading records
- Non-API-initiated transaction records
You can use this page to query all historical fund changes in your account for management and audit purposes.
Was this page helpful?