Co-Signer Deployment
Co-Signer Server Configuration Requirements
Minimum CPU Requirement: AMD64 or ARM64 architecture, 8 cores, 2.0 GHz
Memory: 64GB
Disk: 256GB
OS: Ubuntu-22.04
Co-Signer Deployment Process
Obtain Co-Signer
- Regular Version
Run the program to download
File address: https://github.com/ChainUp-Custody/mpc-co-signer/releases, select co-signer-linux-(version)-static version, this version can run directly on Linux.
Take version v1.3.1 as an example. Please replace the relevant version when actually using it.
wget https://github.com/ChainUp-Custody/mpc-co-signer/releases/download/v1.3.1/co-signer-linux-v1.3.1-static
Modify the program’s executable permissions
chmod +x co-signer-linux-v1.3.1-static
mv co-signer-linux-v1.3.1-static co-signer
- SGX Version(step 1~7)
Purchase Microsoft Azure SGX Server
For Microsoft Azure SGX servers, please refer to the documentation:https://learn.microsoft.com/zh-cn/azure/confidential-computing/virtual-machine-solutions-sgx
Install ego Environment
sudo apt-get install software-properties-common
sudo apt install snapd
sudo wget -qO- https://download.01.org/intel-sgx/sgx_repo/ubuntu/intel-sgx-deb.key | sudo apt-key add
sudo add-apt-repository "deb [arch=amd64] https://download.01.org/intel-sgx/sgx_repo/ubuntu `lsb_release -cs` main"
sudo wget https://github.com/edgelesssys/ego/releases/download/v1.3.0/ego_1.3.0_amd64.deb
sudo apt install -y ./ego_1.3.0_amd64.deb build-essential libssl-dev
Create a working directory
Take the directory /data/co-signer/ as an example. Please replace the relevant working directory in actual use.
mkdir -p /data/co-signer/
Switch to the working directory
cd /data/co-signer/
Download the program
Take version v1.3.1 as an example. Please replace the relevant version when actually using it.
File address: https://github.com/ChainUp-Custody/mpc-co-signer/releases, select version co-signer-linux-(version), please follow the subsequent steps to compile and package using ego.
wget https://github.com/ChainUp-Custody/mpc-co-signer/releases/download/v1.3.1/co-signer-linux-v1.3.1
Note: Support for SGX is available after v1.1.0.
Add the configuration file enclave.json in the working directory, with the following content
Important Note
-
The value of
exein the configuration file: co-signer-linux-v1.3.1 (example). If the executable program name is modified, the value ofexeneeds to be changed to the custom name. -
The configuration file specifies that Co-Signer can only run under the directory /data/co-signer/ (example). If you need to customize the running directory, please modify all occurrences of /data/co-signer/ in the configuration to the custom directory.
-
Heap memory, heapSize configuration is recommended to be set to: 60G (61440).
cat>./enclave.json<< EOF
{
    "exe": "co-signer-linux-v1.3.1",
    "key": "private.pem",
    "debug": false,
    "heapSize": 61440,
    "executableHeap": false,
    "productID": 1,
    "securityVersion": 1,
    "mounts": [{"readOnly":false, "type":"hostfs", "source":"/etc/ssl/certs/", "target":"/etc/ssl/certs/"},{"readOnly":false, "type":"hostfs", "source":"/data/co-signer/", "target":"/data/co-signer/"}],
    "env": [{"name":"HOME","fromHost":true},{"name":"PWD","value":"/data/co-signer/"}],
    "files": null
}
EOF
Re-sign and package to obtain a runnable SGX executable program
Take version v1.3.1 as an example. Please replace the relevant version when actually using it.
ego sign

ego bundle co-signer-linux-v1.3.1
mv co-signer-linux-v1.3.1-bundle co-signer
Running Co-Signer
To view the help for the executable program: co-signer -h. The result is as follows:
v1.1.0

Usage: co-signer [-hv] [-server] [-rsa-gen] [-recover-seed mnemonic] [-rsa-pri-import rsa private key] [-verify-sign-pub-import develop rsa public key to verify unsign transaction] [-keystore-gen] [-custody
-pub-import]

Options:
    -custody-pub-import string
            import custody public key
    -h this is help
    -keystore-gen
            Used to merge files (including seed.dat, rsaPri.pem, etc.) to generate a new keystore.json file
    -recover-seed string
            recover seed by mnemonic, use '-' between each word
    -rsa-gen
            generate rsa pem by tools
    -show-rsa
            show all rsa public key
    -rsa-pri-import string
            import current rsa private key
    -server
            start co-signer otherwise only tools
    -v this is version
    -verify-sign-pub-import string
            import the public key used for verifying sign


*Explanation**
1. -v:                               Get the version number of Co-Signer.
2. -server:                          Parameter to start Co-Signer. If not used, it operates in tool mode.
3. -conf:                            Specify the configuration file when starting Co-Signer. Default: ./conf/config.yaml
4. -rsa-gen:                         Tool mode: Input the startup password to generate an encrypted private key and an unencrypted public key, stored in the keystore.json file.
5. -rsa-pri-import:                  Tool mode: Input the startup password to import an existing RSA private key, generate an encrypted RSA private key file (import only the private key), stored in the keystore.json file.
6. -verify-sign-pub-import:          Tool mode: Import the public key used for verifying client signatures (sign). Stored in the keystore.json file. After import, Co-Signer will verify client signatures (sign) for withdrawals and web3 transactions. See the API documentation for sign generation details.
7. -custody-pub-import:              Tool mode: Input the startup password to import Custody's public key, stored in the keystore.json file.
8. -keystore-gen:                    Tool mode: Used to unify the import of files such as seed.dat, rsaPri.pem, rsaPub.pem from v1.0.x versions into the keystore.json file.
9. -show-rsa:                        Tool mode: Show all RSA public key
Adding Configuration and Starting Co-Signer
Create a Folder in the Same Directory as the Executable Program
mkdir conf
Add Configuration File in the conf Directory, File Name: config.yaml
Configuration file content as follows:
## Main Configuration Information
main:
    ## [Required] Co-signer service IP address
    tcp: "0.0.0.0:28888"
    ## [Required] Encrypted storage file used by v1.1.x version
    keystore_file: "conf/keystore.json"

## Custody System
custody_service:
    ## [Required] app_id, obtained after creating a merchant
    app_id: ""
    ## [Required] api domain address, see interface documentation
    domain: "https://openapi.chainup.com/"
    ## [Optional] Request and response language, supporting zh_CN and en_US
    language: "zh_CN"

## Client System
custom_service:
    ## [Optional] Withdrawal callback client system address for signature confirmation before signing, details see: https://custodydocs-zh.chainup.com/api-references/mpc-apis/co-signer/callback/withdraw, mandatory sign verification when not configured
    withdraw_callback_url: ""
    ## [Optional] Web3 transaction callback client system address for signature confirmation before signing, details see: https://custodydocs-zh.chainup.com/api-references/mpc-apis/co-signer/callback/web3, mandatory sign verification when not configured
    web3_callback_url: ""
Configure the Rsa Private Key Used by Co-Signer
Method One: Co-Signer Generates Rsa Public and Private Keys
./co-signer -rsa-gen
After executing the above command, enter the Co-Signer startup password as prompted. After successful execution, the keystore.json file is generated/updated in the conf directory.
The private key is used to encrypt request parameters when requesting Custody service, and the corresponding public key needs to be configured to Custody. Custody uses this public key to decrypt Co-Signer request data.
Method Two: Client Generates Rsa Private Key and Imports into Co-Signer
./co-signer -rsa-pri-import MIIEvwIBADANBgkqhkiG9w0BAQEFAASCBKkwggSlAgEAAoIBAQCzoQHv17B0tMPPLn8JzQd4OAovEYYhAyKXSK4WTvnf/WHsspzo4n3gpjdQPuQysri5iMIocAnZYgmQCosDiOIYSx4p9HJxTYRIzPZ25SjMtpxbzgHQtyIaw4CcPkE6CF7vDUpwil1T9NfegsvhWZ/9wAOf4AJmJIEvOnbAIq6DMpgGu59mWidRKls7UtQ9cwf2NYcE3eUE985juCsDOummmWLS1hBto7nCIiEhtXCGJgWCZyVrAWQZ10tIo0XW5ftiCU4EE5GgWNi6xA6GL6/xdygsCh3tsKRUfcfHIAFmEhVJoUrMiuws5xua1qPotz0t2Tm5QTHkrCGUeizzDJjhAgMBAAECggEBAIvnx35q3ADKGghwCnozurGj1Cq811829eYmsZCminAvBeo5Y4Tvg2NJkqNpmIr0MHQxVCfyu3kYpqIN1CA4qQCK4T+EKO6elX2uRfhsm852HGpUlY1eVa3Kv4zx4BO3GVnPXD8zRWVyuf+QmAM4rygQOcJ30uaDYCrMulkDqjB8FF8JrE0ycCdT2lvEvAAU3e8YeDRaOaYkBhRjDVntE+VjAyCDgvqtgwpI1A7iYK5o/lU+64BlQkp6xpglN5BF1aXwj3O4+zT7WJBkZqPMOHO11o81w3oCDXO9xZPMnjsO7o5HPKhCkEiaLQrymzzbgR7UYLP56OkTnlSb6sYG99ECgYEA6AxypkvKlc4fU6PIIfxUsJfjJyRIucg+SsiOFxJDQ1JWx6sCKnj2Ak4T/bPLmBEAeoBCnRH8EviovYsUSn0VOj92akODOilywB8GSnLWg+0D7v3sKQVcKd2ykRTk9nS3YRz1nFX+SsdWrrCk7g3aLw6BiGz/uSVEmzqOXf6D2dMCgYEAxitx0iFytrdnD8dfPr0C/OSZUG0UIC6DU/BWlbY3Ws6EpQxPiZp7NtKLNS9UohFk89YplZJKnVfX0vTtnJMaXn7iTf6XNTr2o4hwCK8CIB8Zjw56oCaDBdwbOxoOVh0Kpt4uueFg9GTPP6a6+kk/APNcbekpJzRMQ8RqE4OuffsCgYEAqYT2eMAjtj7Hqe2bdiCFqiC7xEuAiaBcyXssOnSQCO1tEh6+zVJivhpWBmBD2sqI4/UxNNf/o8heVWH2J9irGktkcYryohnHh8ziZp7wUZ5j4kNENE+DHd6k5dIy1k077kkesOAtjmmDzMilJHegLgJV5NlkE9jC/vfPK6GUpxsCgYAV3jVxOr+t6g81borUIYdy4McKWP8fjgJwANWNL85r9t4sWG9uf92Y7yLte4ubVtANGFT+bGZPdqIaZWzTGmiOhPH0KWQGO7t70FKMosNZSBVJ9A8UHSvYObHHk9iBKDNEtr/xQy2vynAUVhHMDMknEbPhbRldeifwUnxiKuXWgQKBgQCZkVUrQZJ73Qf8jOiBA1x1Frh8yxSdU/mrvWV/SvC31BbHt3aGKPeKFOfTrQVmAgME4JsAOxwIL0X6C5MdxCOy5Lbefgk8OBpkV8VthNzMQbDXjcWgiYO46G5NFE/kbR0CZzqUFgZkqktQw0aONcUaUhxT9YmhCkWzyiuWd4yCLQ==
After executing the above command, enter the Co-Signer startup password as prompted. After successful execution, the keystore.json file is generated/updated in the conf directory.
The private key is used to encrypt request parameters when requesting Custody service, and the corresponding public key needs to be configured to Custody. Custody uses this public key to decrypt Co-Signer request data
Configure Custody Public Key for Co-Signer
./co-signer -custody-pub-import 'Custody RSA Public key'
After executing the above command, enter the Co-Signer startup password as prompted. After successful execution, the keystore.json file is generated/updated in the conf directory.
This public key is provided by Custody, and Co-Signer uses this public key to decrypt the returned data from Custody services.
[Optional] Configure the Public Key Used for Sign Verification (sign) When Co-Signer Does Not Callback the Client System
./co-signer -verify-sign-pub-import 'RSA Public key'
Client generates RSA public key
After executing the above command, enter the Co-Signer startup password as prompted. After successful execution, the keystore.json file is generated/updated in the conf directory.
After import, Co-Signer will verify the withdrawal and web3 transaction signatures (sign), see Co-Signer transaction signature for sign generation method details.
Show Configured RSA Public Key
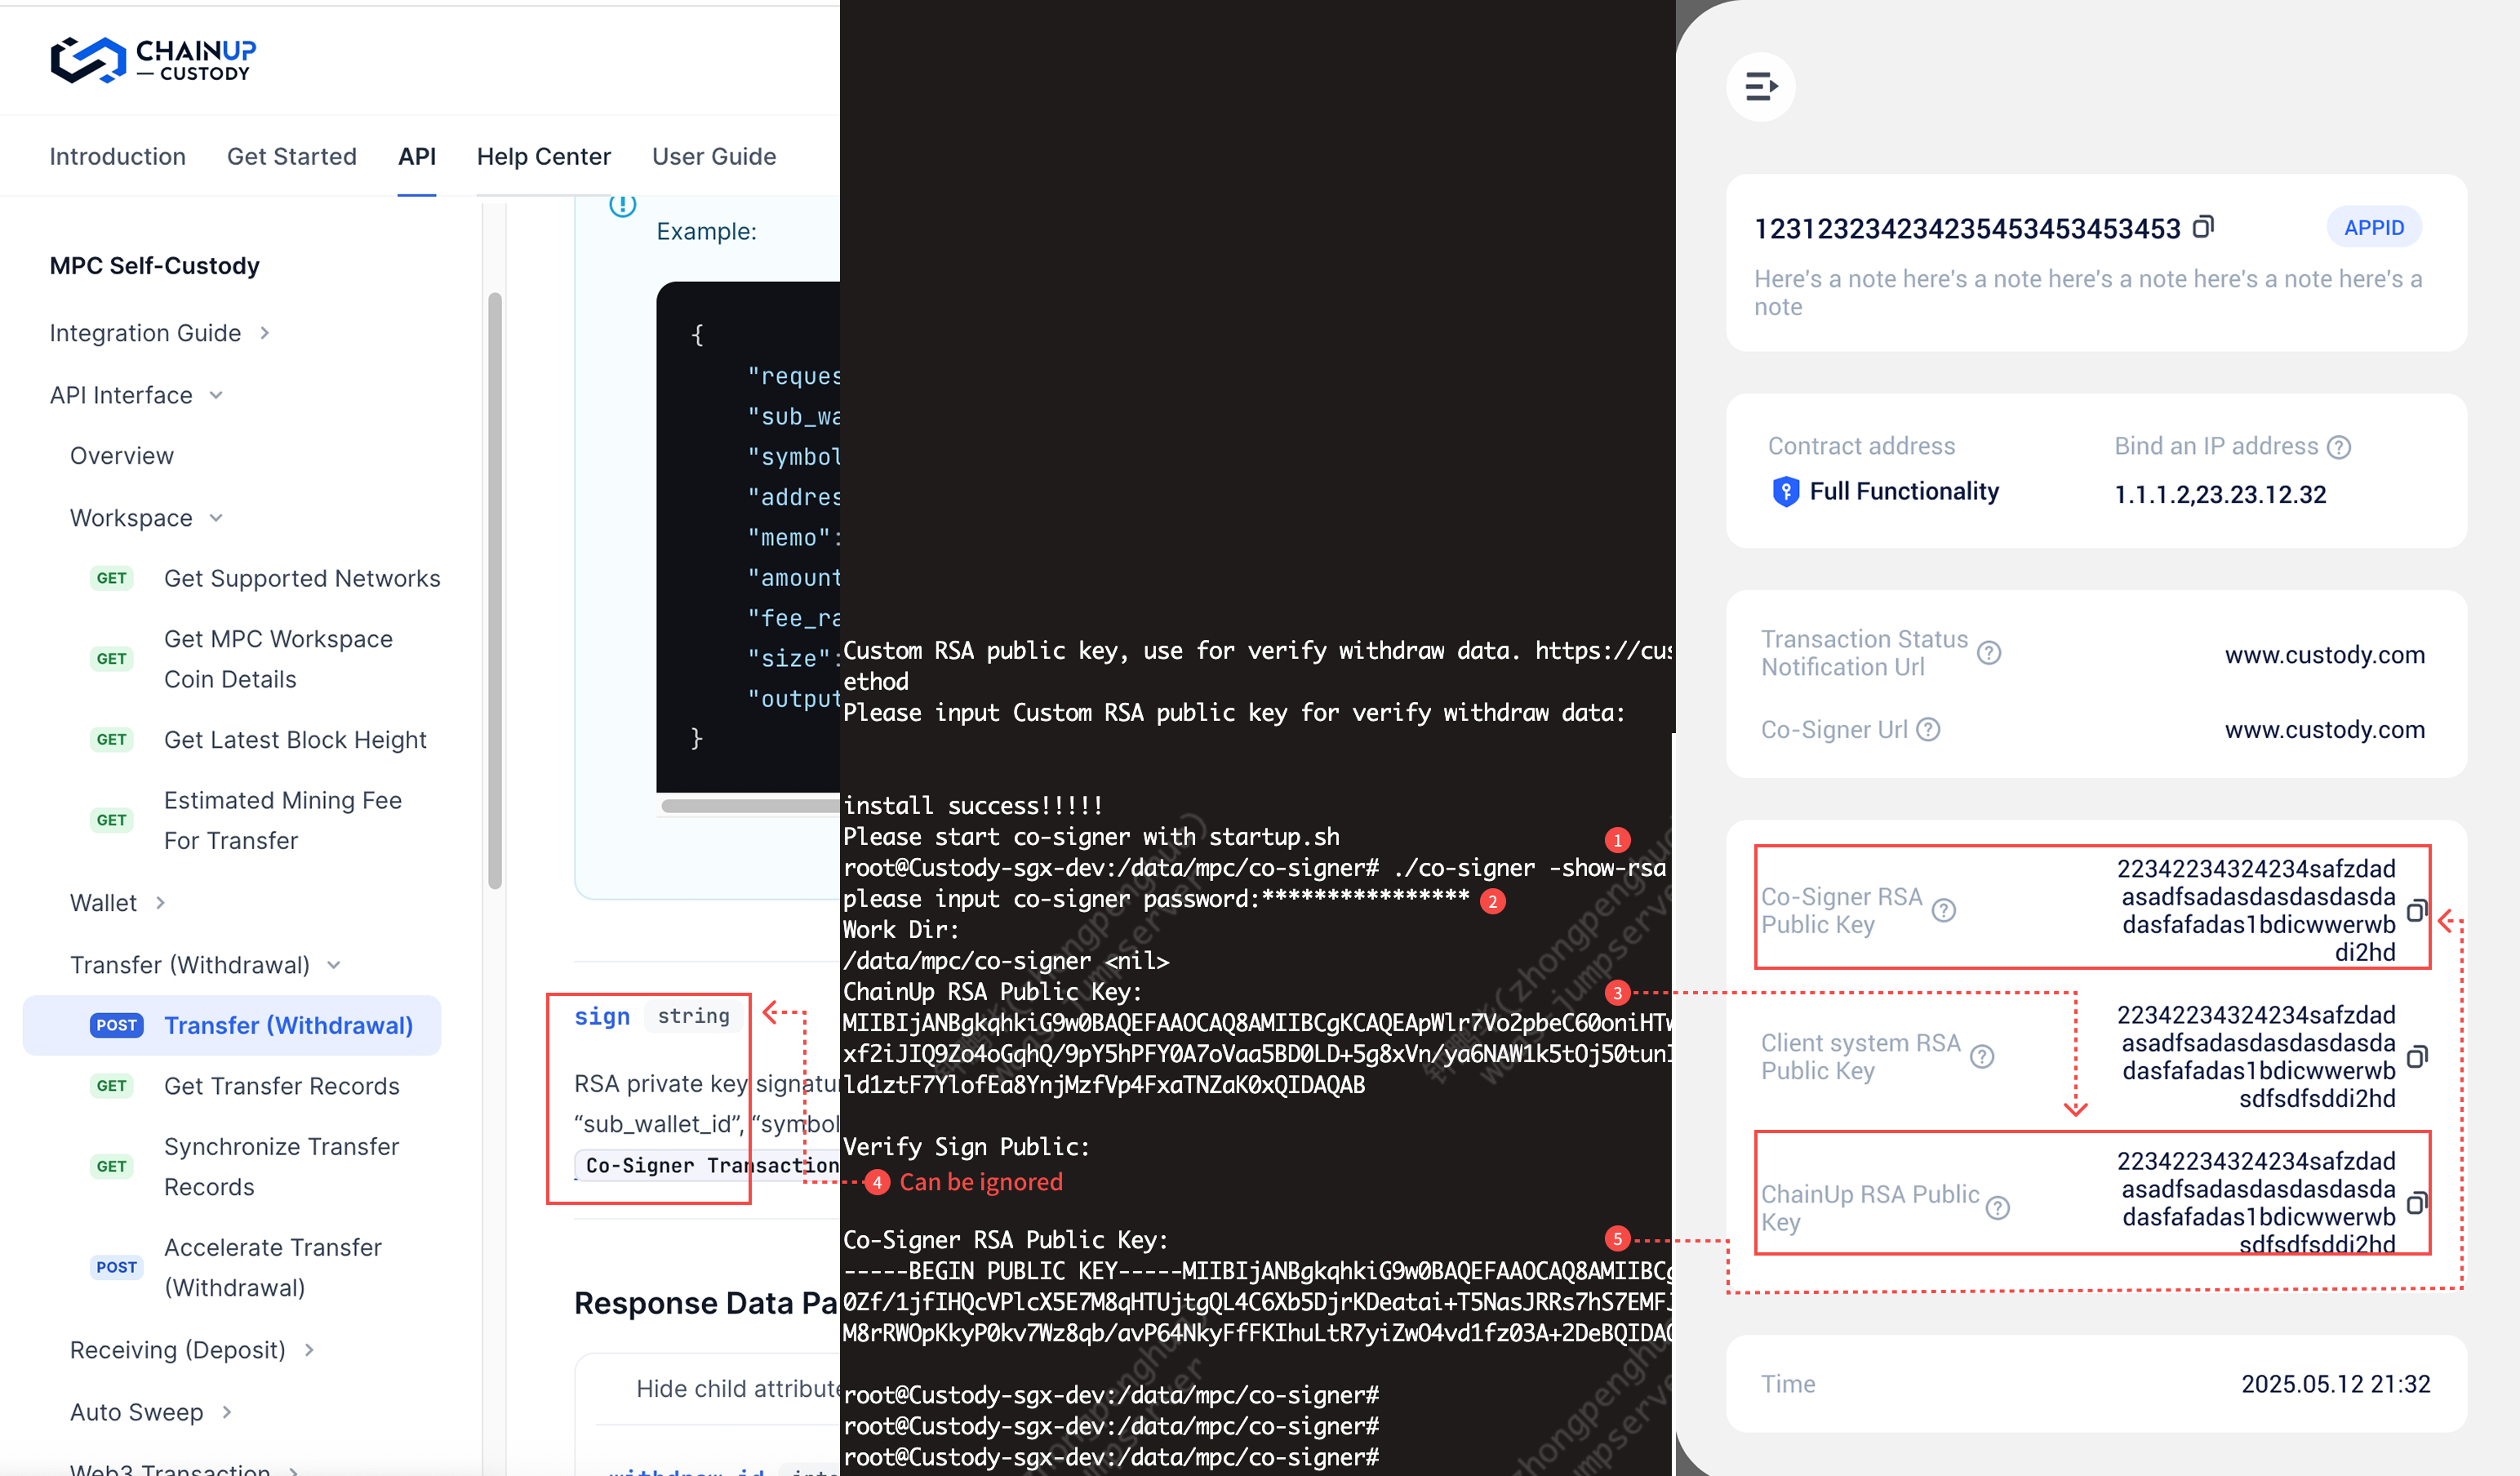
- Example of Shell Script for Starting the Program
To start the Co-Signer, it’s recommended to use a shell script for startup (to avoid password leakage to the terminal).
#!/bin/bash -e

project_path=$(
    cd $(dirname $0)
    pwd
)

STR_PASSWORD=""
echo -n "Please enter your password:"
stty -echo
read STR_PASSWORD
stty echo


if [ ! -n "$STR_PASSWORD" ]; then
    echo "Password cannot be null"
    exit 1
fi

echo ""
echo "Startup Program..."
echo ""

# start
echo ${STR_PASSWORD} | nohup ${project_path}/co-signer -server >>nohup.out 2>&1 &
Co-Signer Quick Deploy Script (Recommend)
Custody also provides a more convenient deployment method, using scripts to generate configuration information and operating environments with one click
Please Obtain Co-Signer program first, and place the program and sh file in the same directory before performing script operations.
install.sh
Follow the prompts, and import the necessary information and configurations to run Co-Signer
Referrence: Transfer Verify Sign & API Information
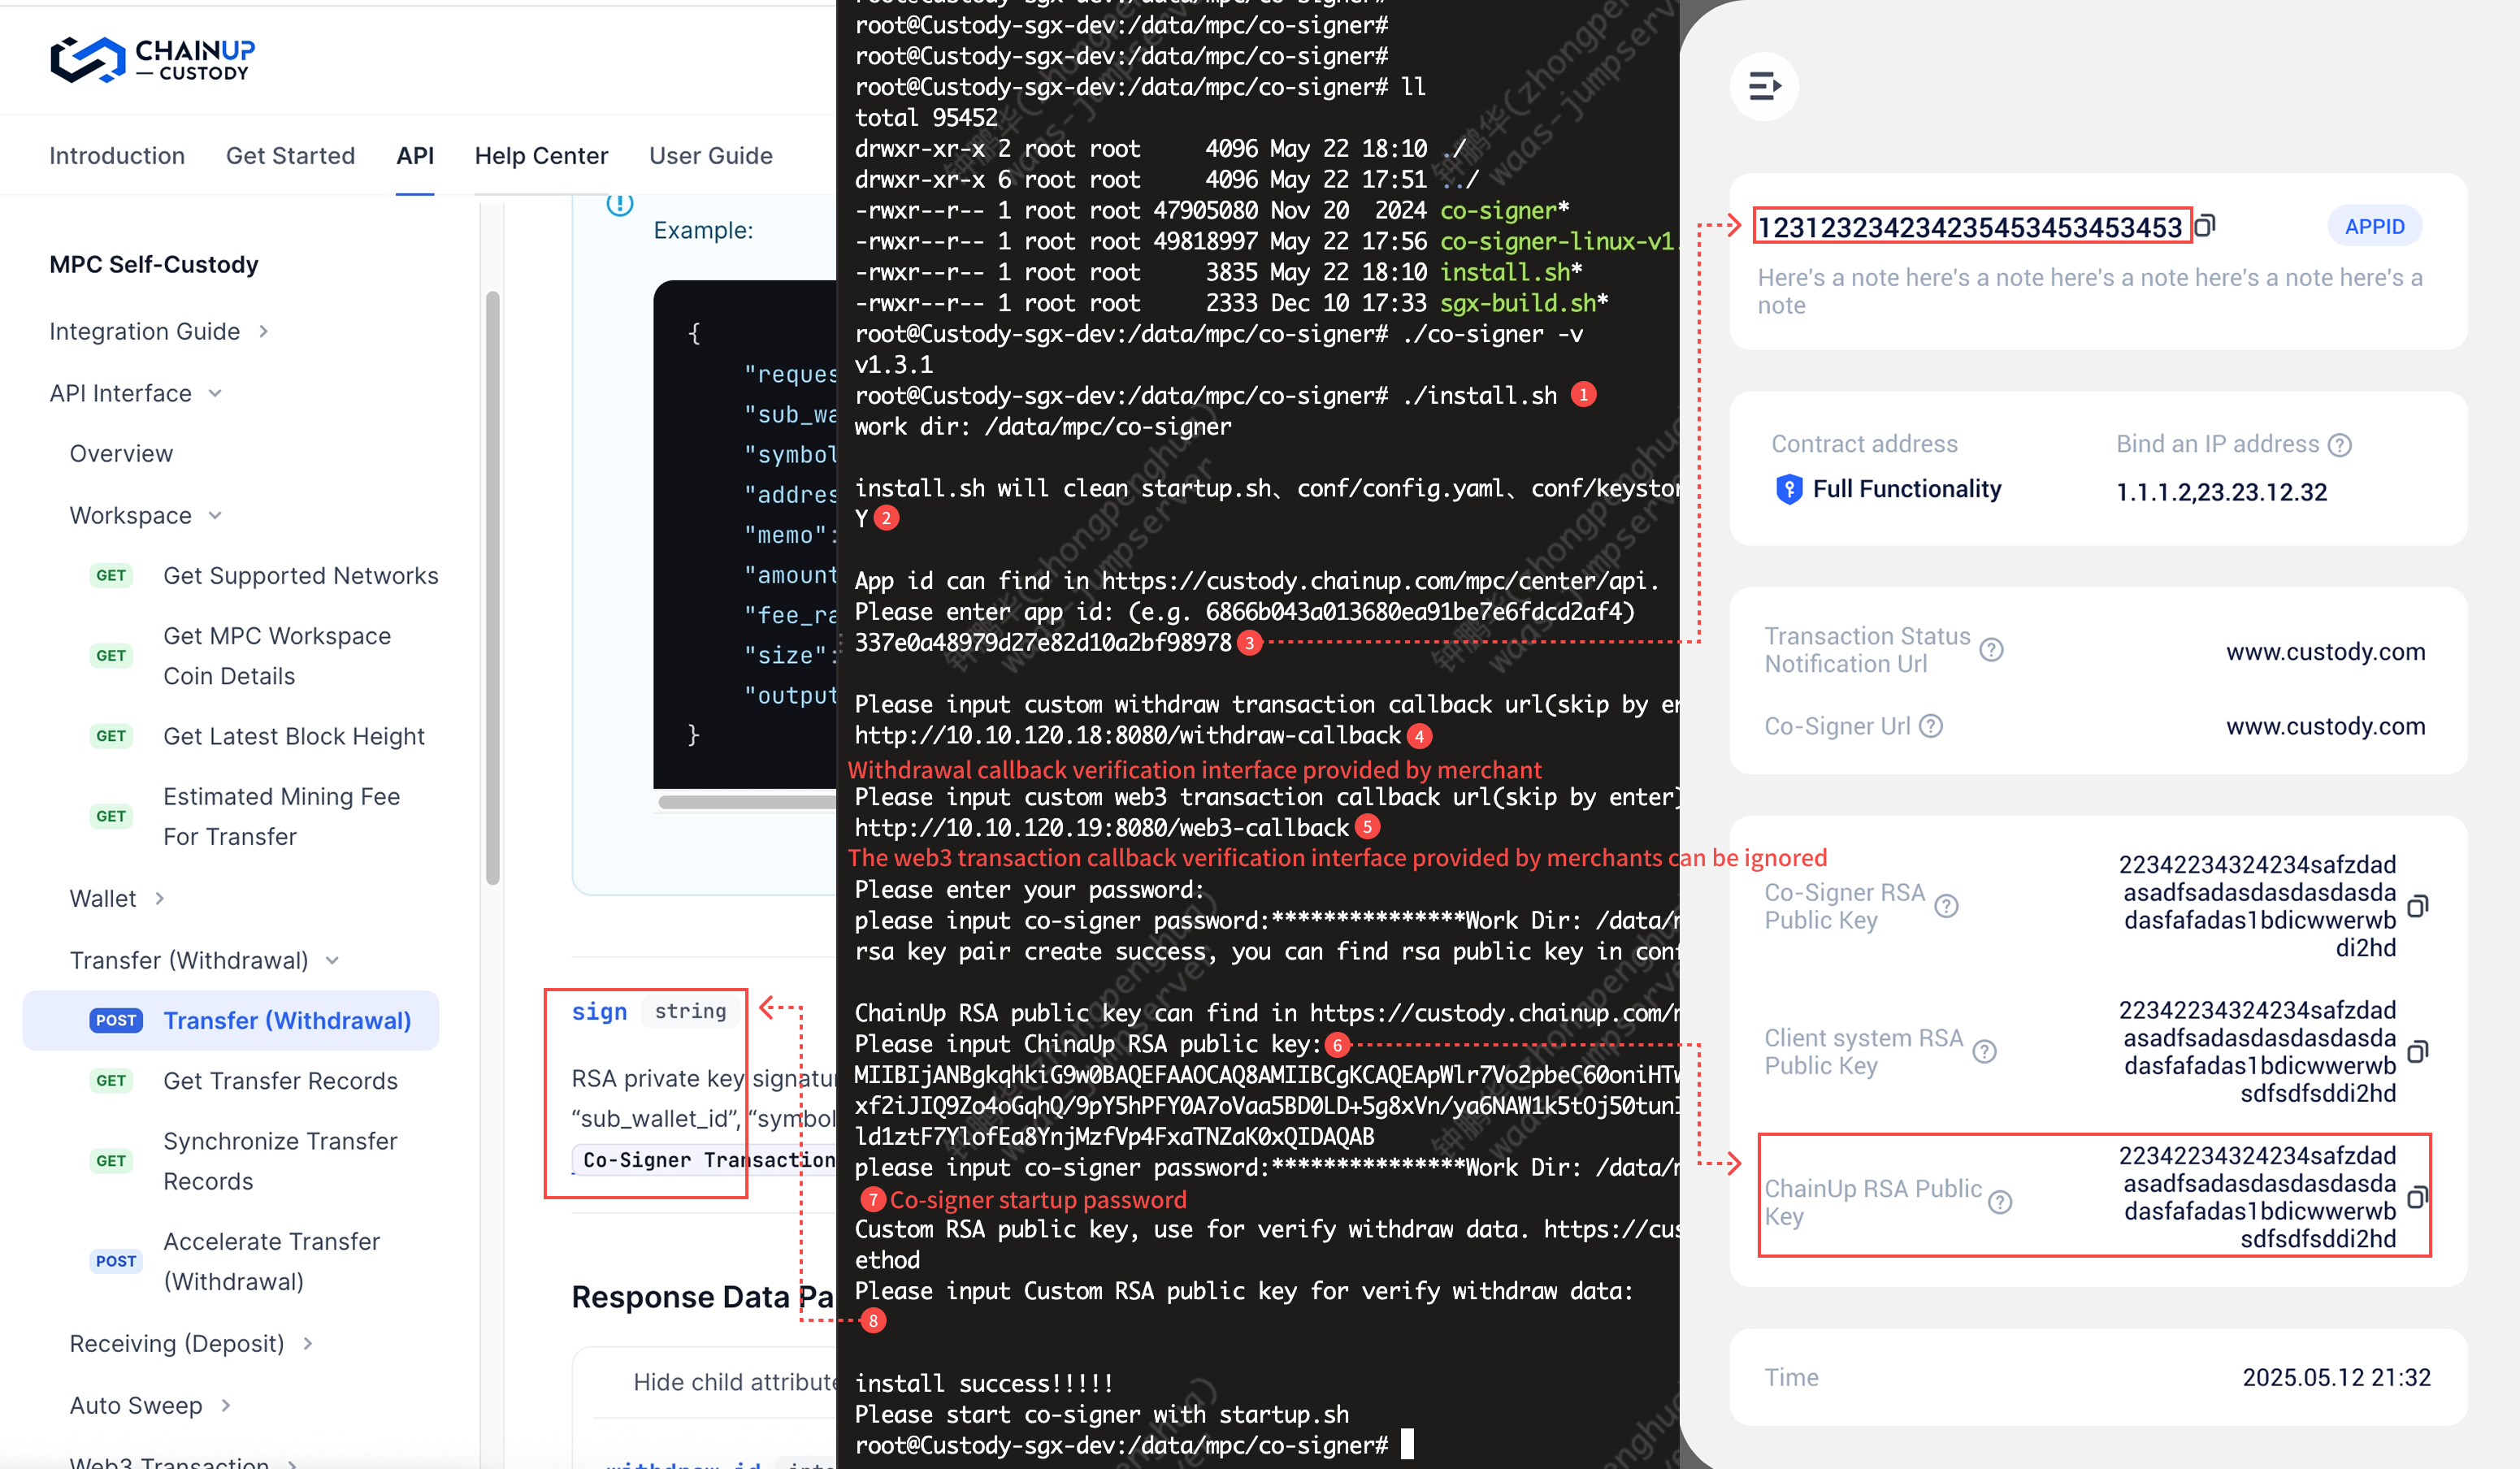
Execute the install.sh script
More details see: https://github.com/ChainUp-Custody/mpc-co-signer/blob/main/README_EN.md
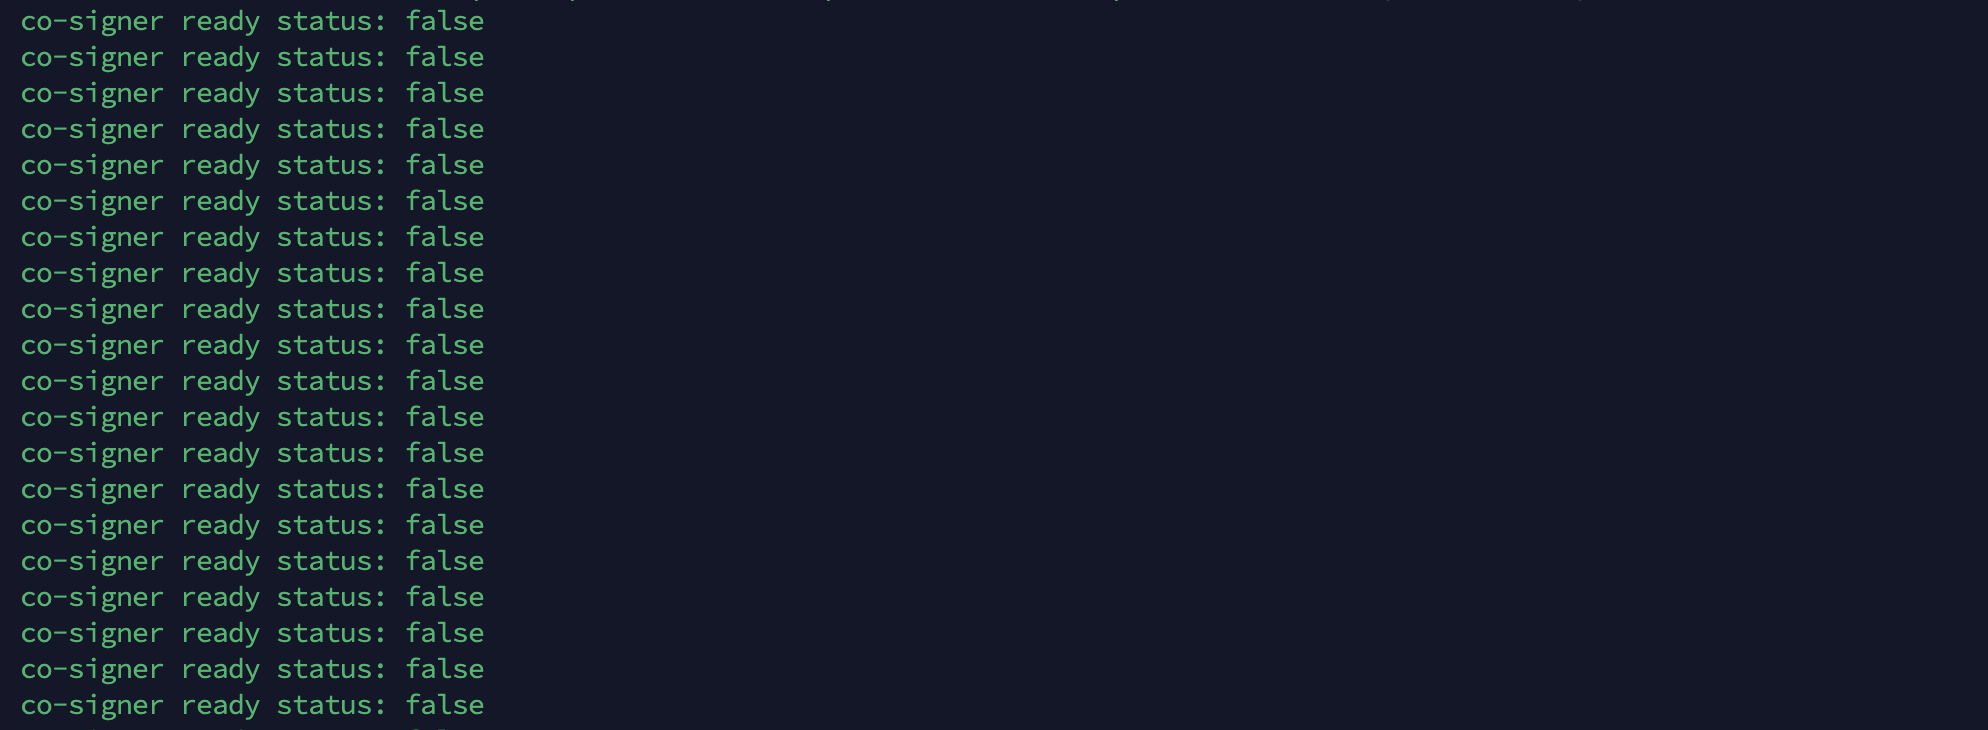
Verification and next steps
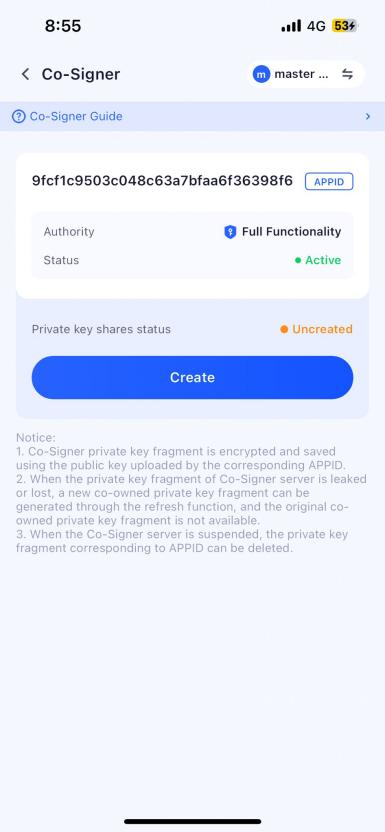
👉 The Co designer has completed configuration and successfully started, but initialization has not yet been completed. The next step is to go to the APP to perform a private key refresh operation to make the service available.
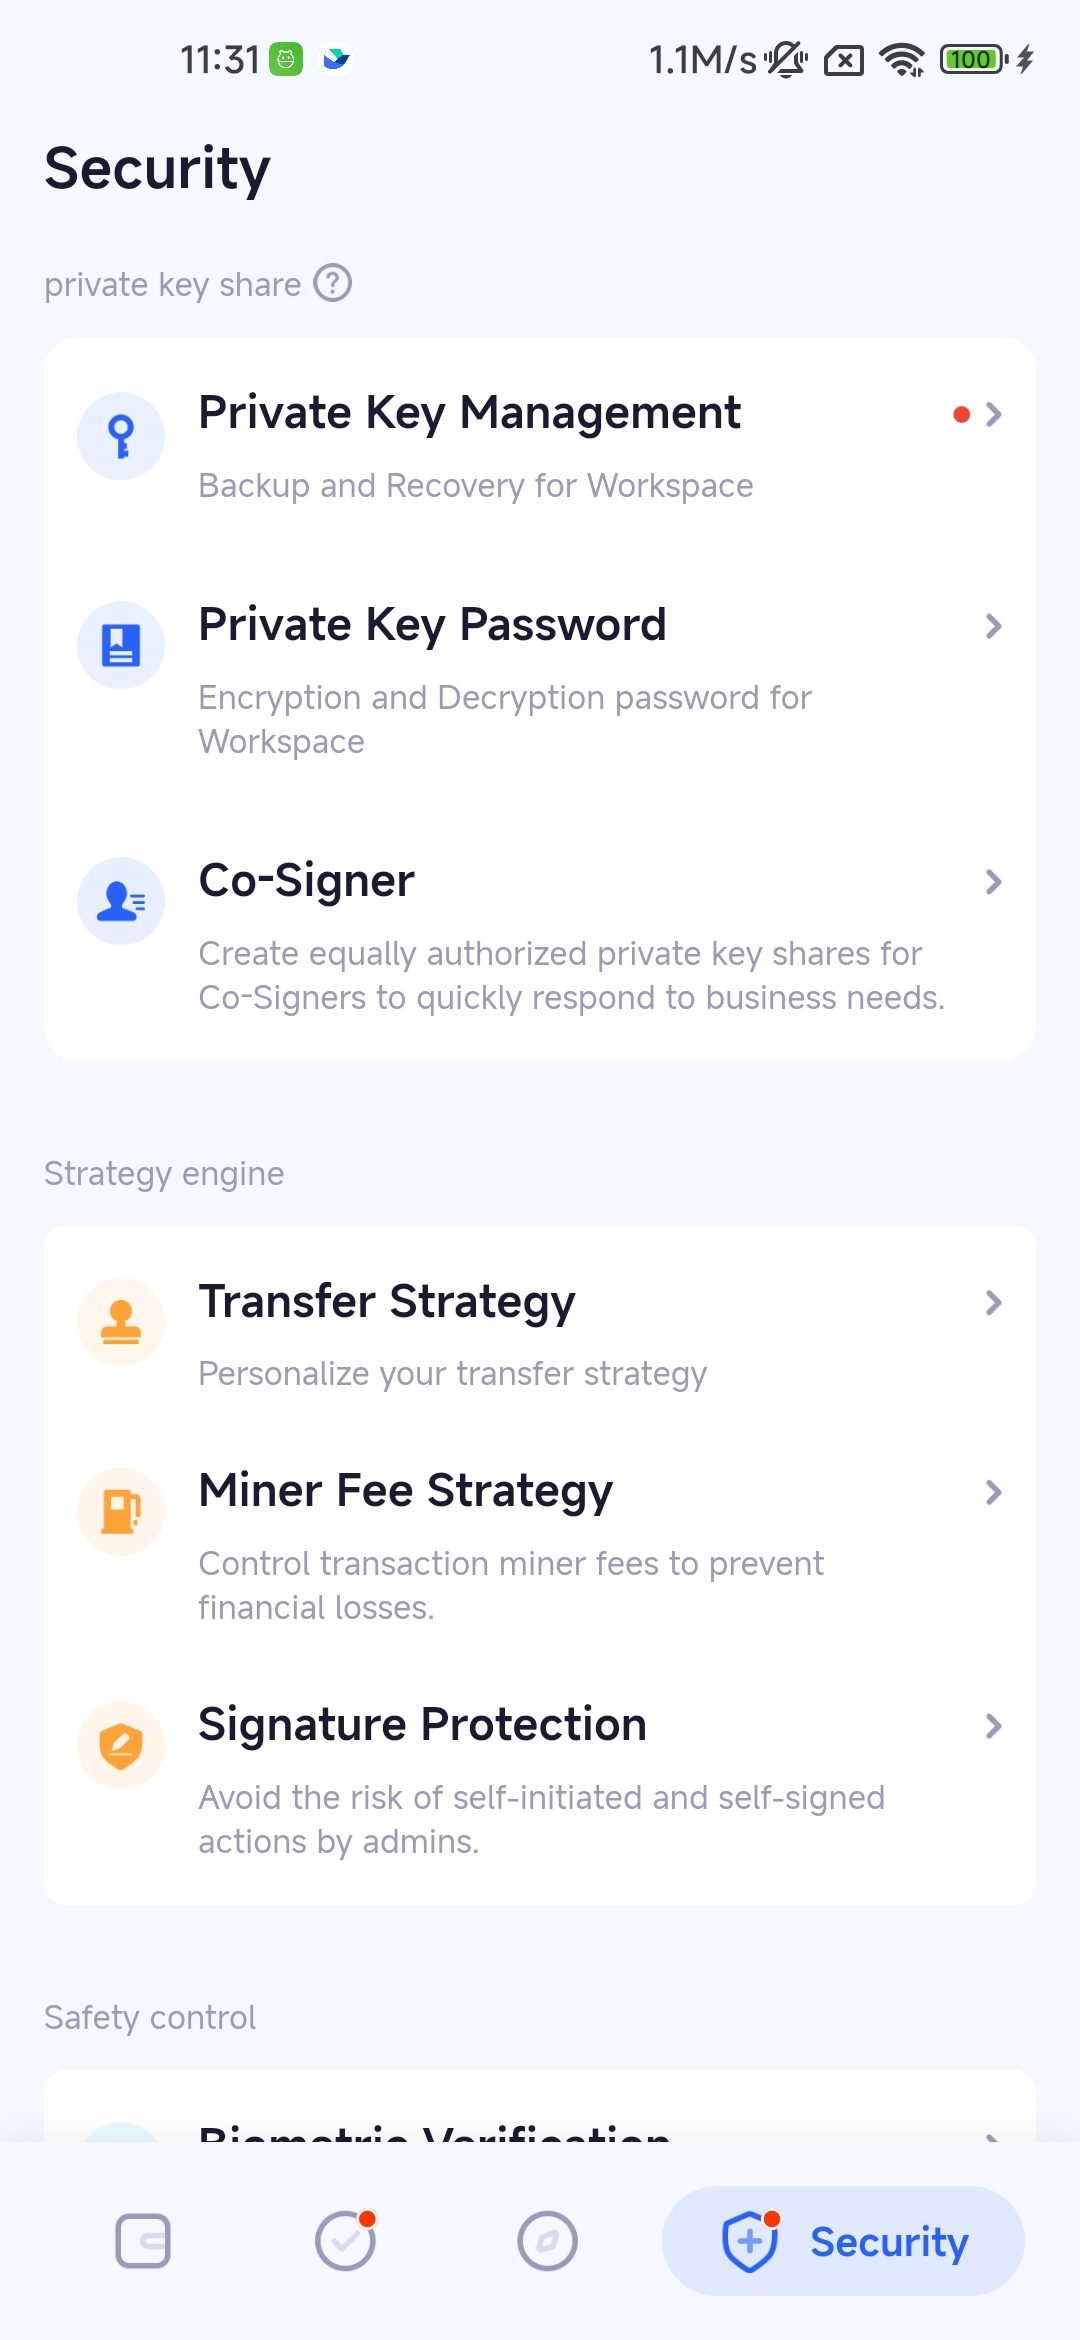
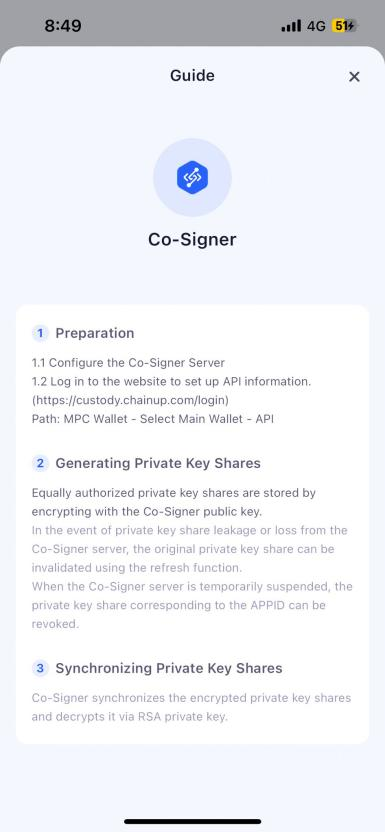
Log in to the APP for Configuration
Log in to the APP, and choose Co-Signer to start configuration after entering the security page.
sgx-build.sh
When deploying Co-Signer in an SGX environment:
Execute the sgx-build.sh script, follow the prompts, and install the necessary environment and related configurations for running Co-Signer under SGX
#!/bin/bash
## sgx build command
## run on ubuntu:20.04

#! /bin/bash
if command -v ego >/dev/null 2>&1; then
  echo "ego already installed..."
else
  apt update
  apt install -y sudo
  sudo apt update

  export DEBIAN_FRONTEND=noninteractive TZ=Etc/UTC

  apt-get -y install tzdata
  sudo apt install -y vim git curl python3 net-tools cron wget
  sudo apt install -y gcc make autoconf automake autotools-dev m4 pkg-config
  sudo apt install -y libtool libboost-all-dev libzmq3-dev libminiupnpc-dev libssl-dev libevent-dev bsdmainutils build-essential
  sudo apt install -y bsdmainutils build-essential
  sudo apt-get install -y software-properties-common
  sudo apt-get update
  sudo wget -qO- https://download.01.org/intel-sgx/sgx_repo/ubuntu/intel-sgx-deb.key | sudo apt-key add
  sudo add-apt-repository "deb [arch=amd64] https://download.01.org/intel-sgx/sgx_repo/ubuntu `lsb_release -cs` main"
  sudo wget https://github.com/edgelesssys/ego/releases/download/v1.3.0/ego_1.3.0_amd64.deb
  sudo apt install -y ./ego_1.3.0_amd64.deb build-essential libssl-dev
fi

WORK_DIR=$(
              cd $(dirname $0)
              pwd
          )
echo "work dir: ${WORK_DIR}"
echo ""

CO_SIGNER_BIN=""
echo "Please input co-signer origin bin file name which download in https://github.com/ChainUp-Custody/mpc-co-signer/releases/:"
read CO_SIGNER_BIN

if [ ! -f "$CO_SIGNER_BIN" ]; then
    echo "$CO_SIGNER_BIN not exist"
    exit 1
fi

>./enclave.json
cat>./enclave.json<< EOF
 {
     "exe": "${CO_SIGNER_BIN}",
     "key": "private.pem",
     "debug": false,
     "heapSize": 61440,
     "executableHeap": false,
     "productID": 1,
     "securityVersion": 1,
     "mounts": [{"readOnly":false, "type":"hostfs", "source":"/etc/ssl/certs/", "target":"/etc/ssl/certs/"},{"readOnly":false, "type":"hostfs", "source":"${WORK_DIR}", "target":"${WORK_DIR}"}],
     "env": [{"name":"HOME","fromHost":true},{"name":"PWD","value":"${WORK_DIR}"}],
     "files": null
 }
EOF

today=$(date "+%Y%m%d%H%M%S")
CO_SIGNER_SGX_BIN="${CO_SIGNER_BIN}.${today}"

export OE_SIMULATION=1
ego sign ${CO_SIGNER_BIN}
ego bundle ${CO_SIGNER_BIN} $CO_SIGNER_SGX_BIN
chmod u+x $CO_SIGNER_SGX_BIN

## need disable simulation end build
unset OE_SIMULATION

echo "Build ${CO_SIGNER_SGX_BIN} success!!!!!"
echo "Please exec \`unset OE_SIMULATION\` disable simulation env"
Add Co-Signer Server to the Whitelist
ChainUp Custody needs access to the Co-Signer to create coequal private keys and generate addresses. Therefore, it’s necessary to add the IP of the Co-Signer server to the security group or whitelist of the ChainUp Custody server. Below are the IP addresses for Custody:
-
Inbound: Allow access from the Custody server (IP: 54.254.7.206) to the Co-Signer server on port 28888. Note that port 28888 is the listening port for the Co-Signer program and can be customized.
-
Outbound: The Co-Signer server needs to access the Custody server, so grant permission to access 54.251.87.91:443.
Was this page helpful?